Setting Up the Web Dashboard
CardinalKit offers a web dashboard that can be used to visualize mobile health data and survey responses, as well as create and schedule surveys.
Requirements
Before getting started, you will need to have configured a Firebase project and connected your CardinalKit iOS or Android app to it. Please refer to the Set up Application Infrastructure section in either the iOS or Android section of this guide if you haven't done this yet, then return to this section to continue setting up the dashboard.
You will need to have Node.js installed on your system. To check if Node.js is installed, open a terminal window and type 'node -v'. If it is installed, the version will be displayed. If not, please visit nodejs.org to download and install it.
You will also need to have the Firebase Command Line Interface (CLI) installed on your system. Installation instructions can be found at firebase.google.com/docs/cli.
Once you have both of these tools installed, you can proceed to the first step below.
1. Configure Your Firebase Project
Before starting this section,
Go to firebase.google.com and sign in with the same account that you set up for the mobile app.
Select the same Firebase project that you created previously. 
Then select Project Settings in the configuration menu. 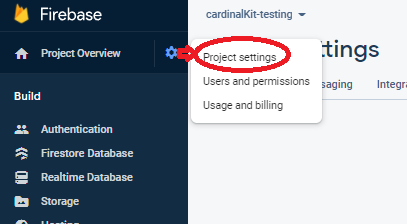
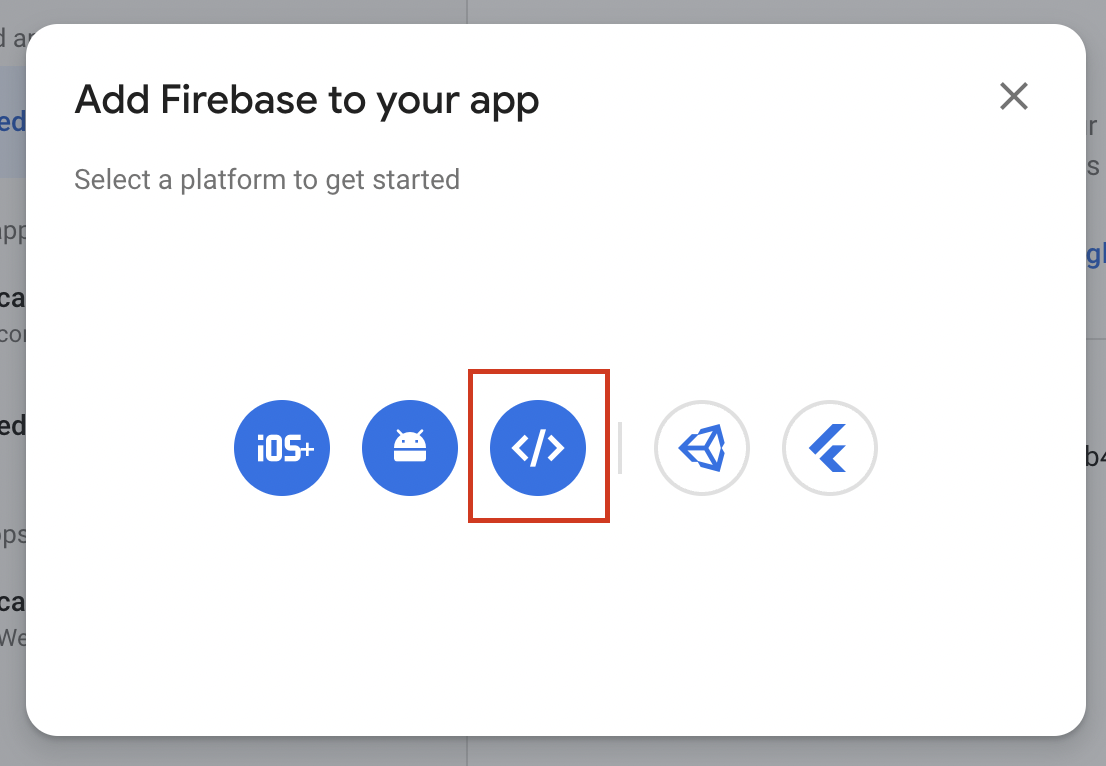
Now select Add app to create a new web application and associate it with Firebase. 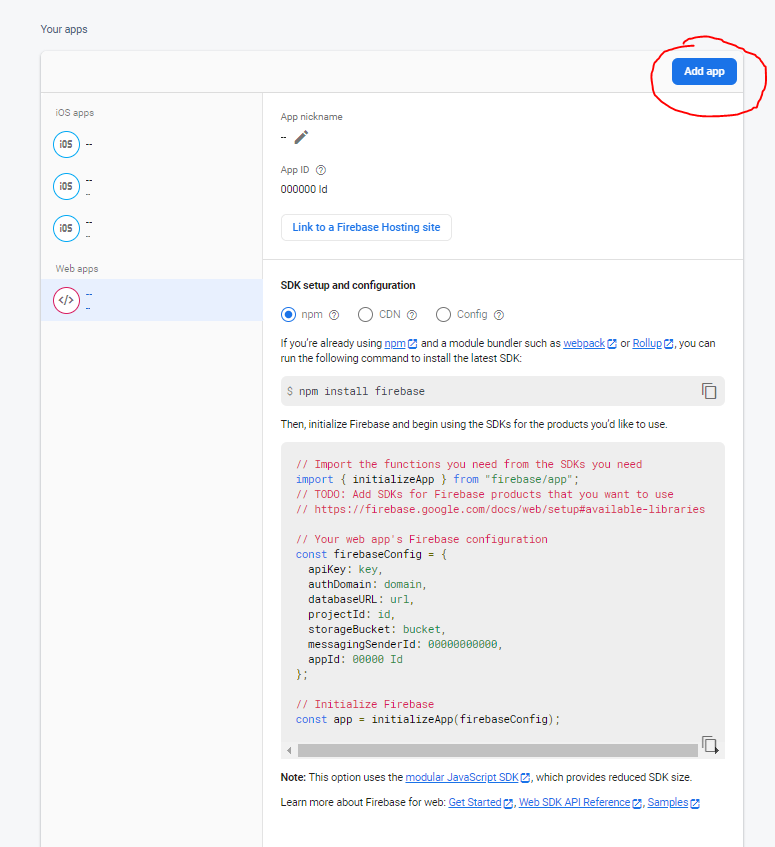
Click on the web app symbol.
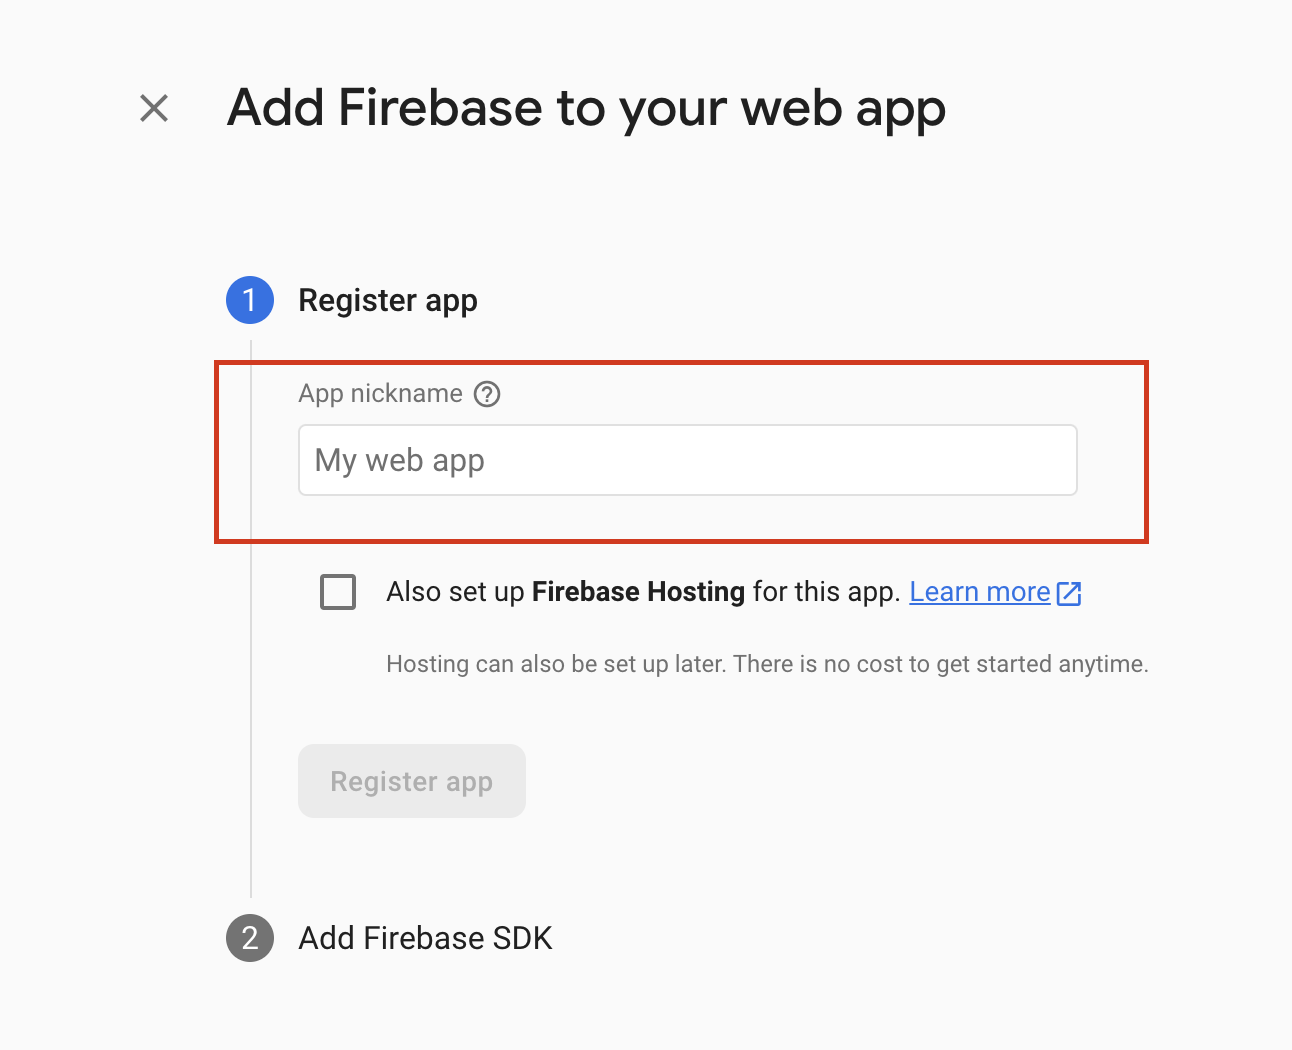
Give your dashboard application a name and then click "Register App" to continue.
Copy and save the generated Firebase configuration details.
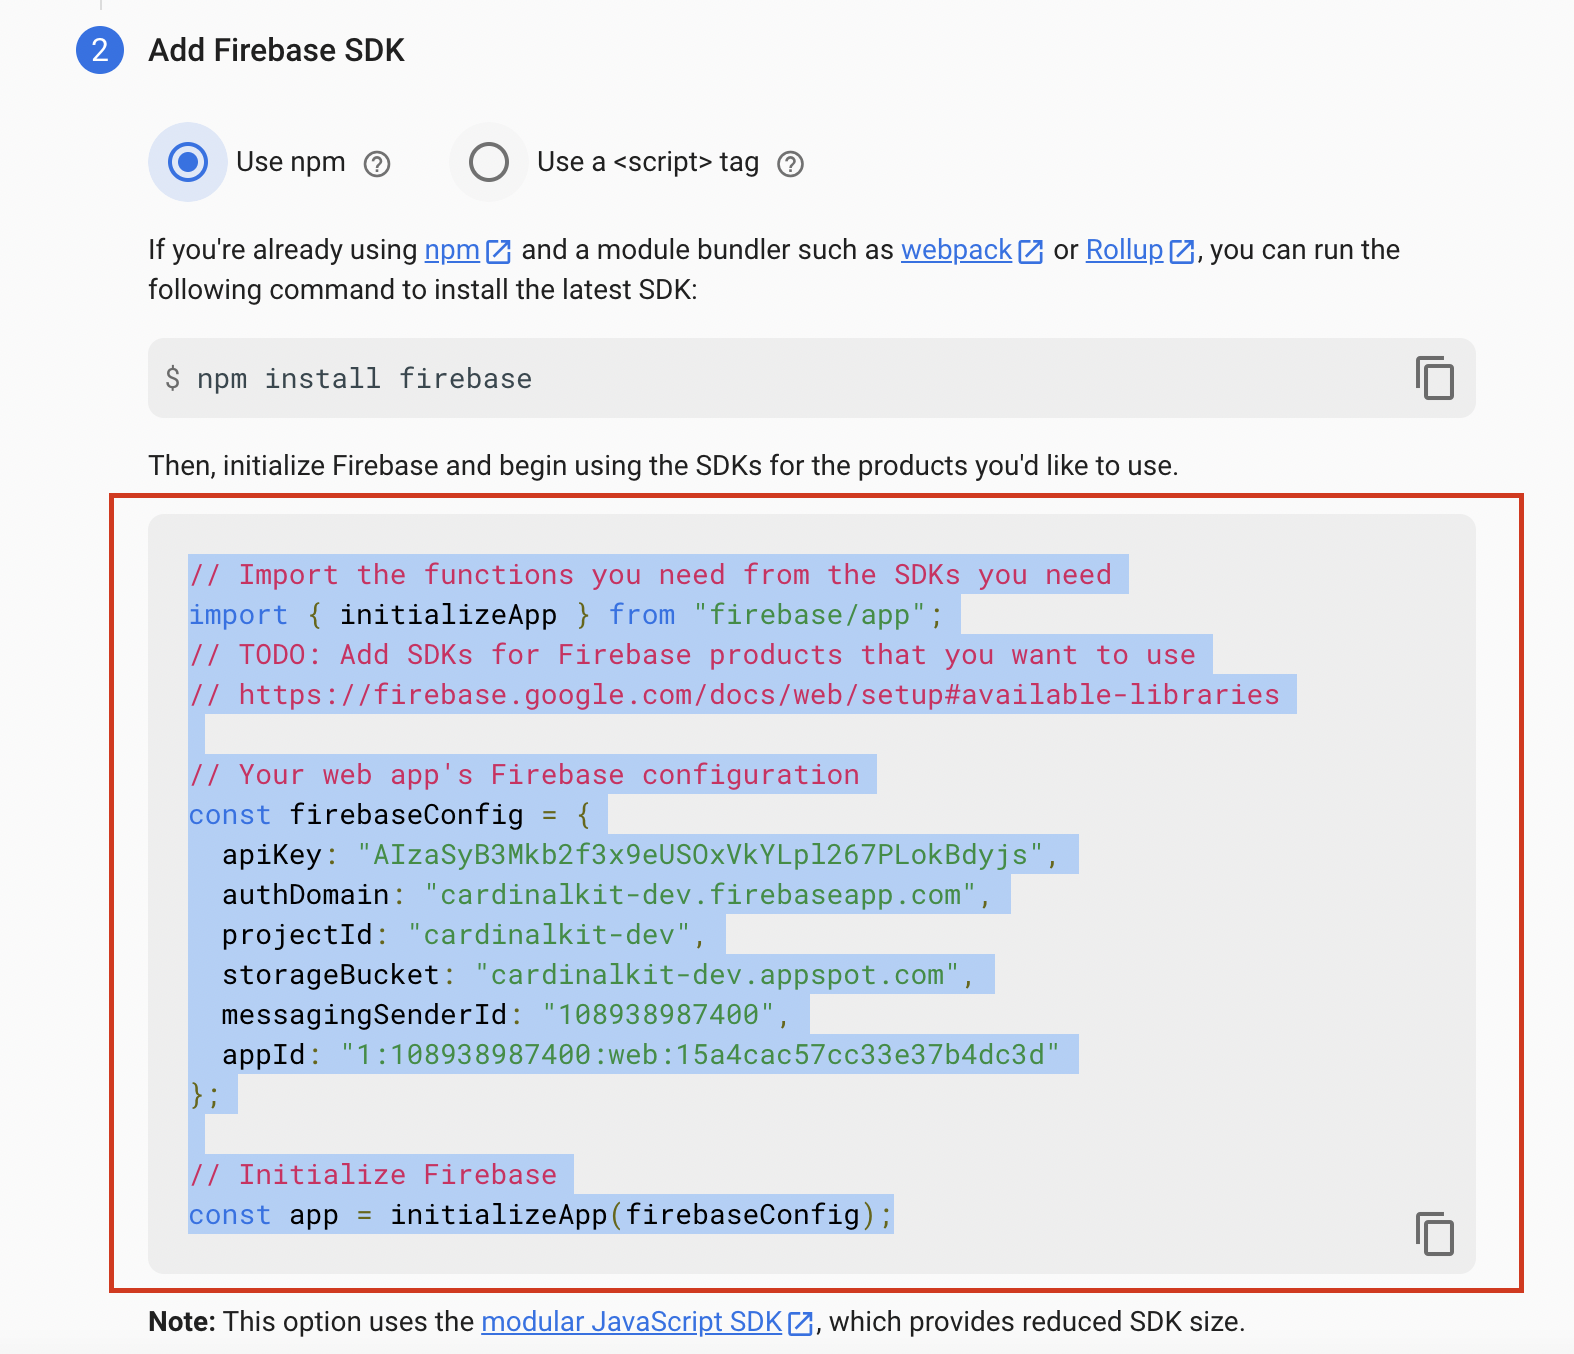
Using a text editor, open the cardinal-kit-web/.env file and replace the bolded keys with their values from the configuration you obtained in the last step.
VUE_APP_FIREBASE_API_KEY = "**apiKey**"
VUE_APP_FIREBASE_AUTH_DOMAIN  = "**authDomain**"
VUE_APP_FIREBASE_PROJECT_ID  = "**projectId**"
VUE_APP_FIREBASE_STORAGE_BUCKET  = "**storageBucket**"
VUE_APP_FIREBASE_MESSAGING_SENDER_ID  = "**messagingSenderId**"
VUE_APP_FIREBASE_APP_ID = "**firebaseConfig.appId**"
2. Create an Administrator account
To manage your dashboard you need to create an Administrator account. This is created from the Firebase console.
From the Firebase console, click on Build on the left sidebar, and then enter the Authentication section.
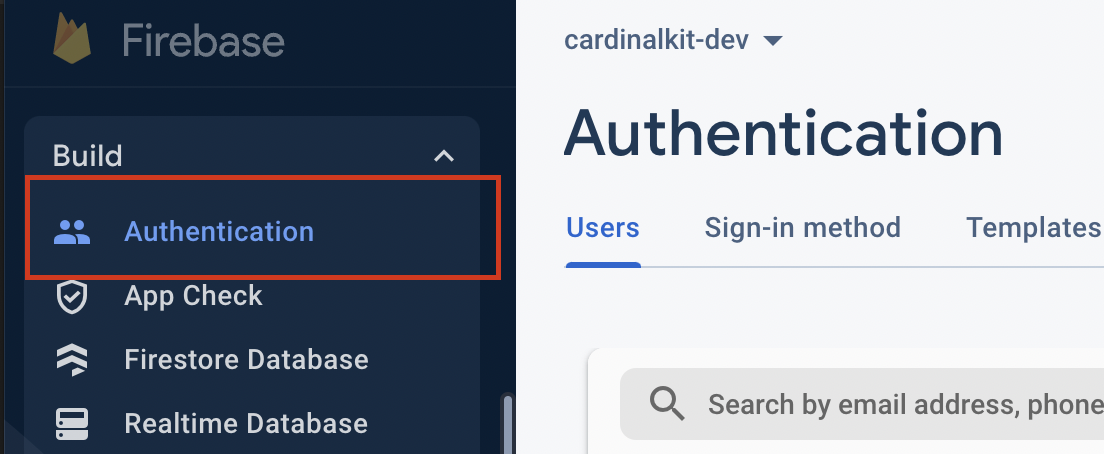
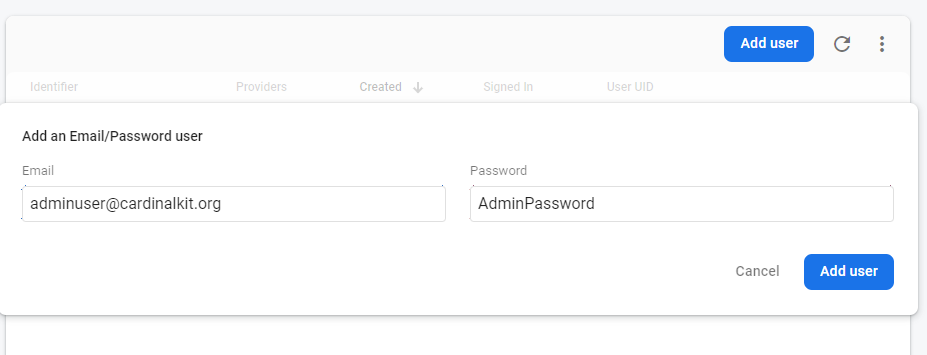
And then add a new user.
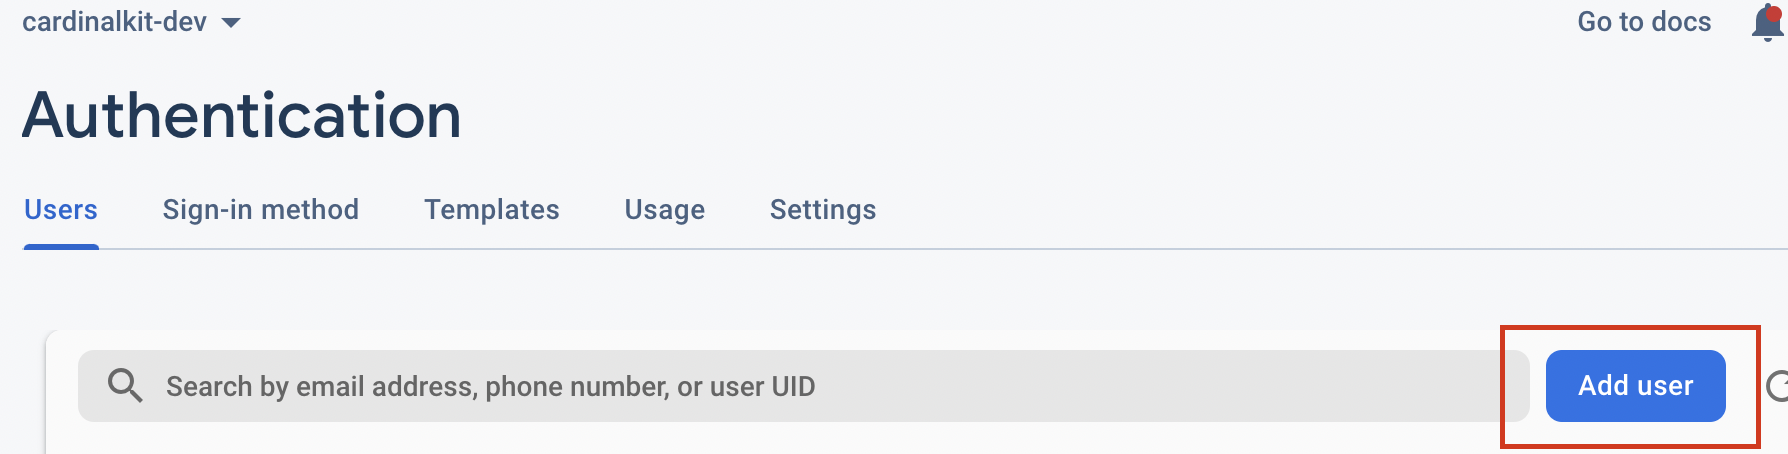
Enter a username and password for the administrator user.
Now you need to indicate to the dashboard that this new user is an administrator user.
User roles are managed in Firestore Database. For users created from the web, this process will be automatic, it is necessary to do it by hand only once for the administrator user.
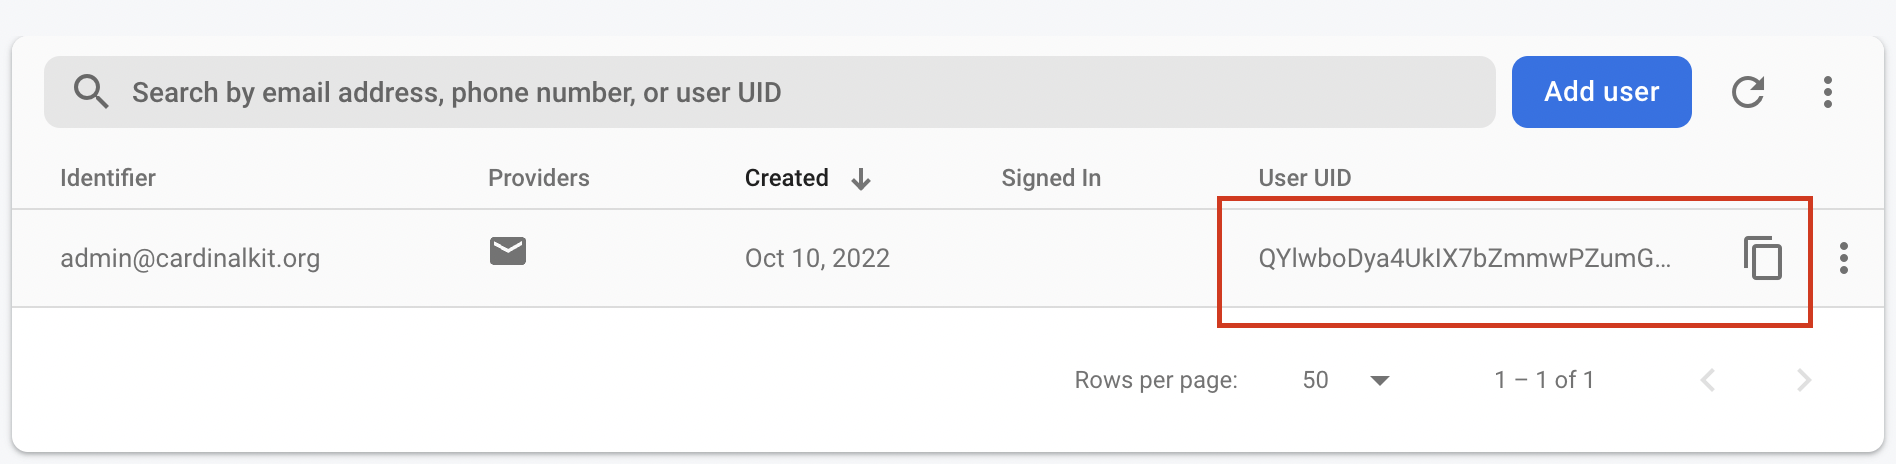
First copy the UID of the user you just created. You can do this by hovering over the UID and clicking on the Copy icon.
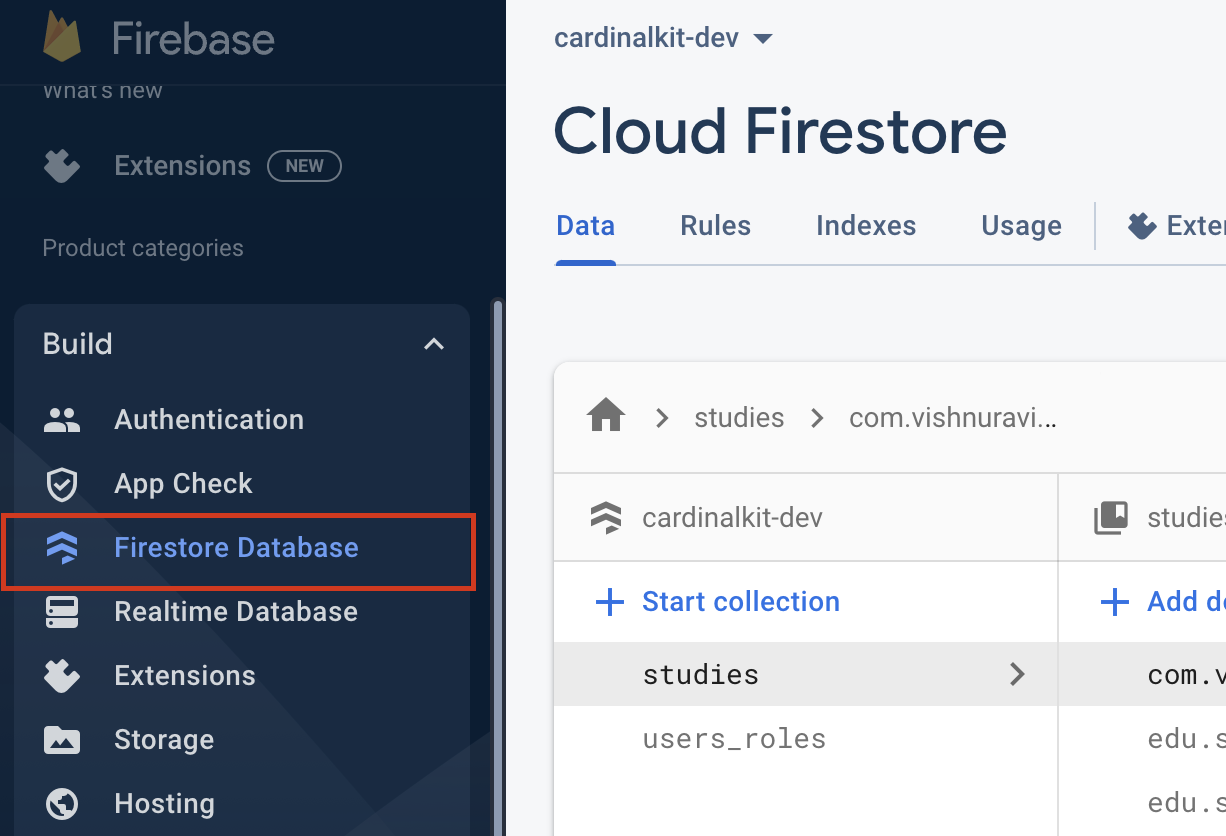
Then click on Firestore Database:
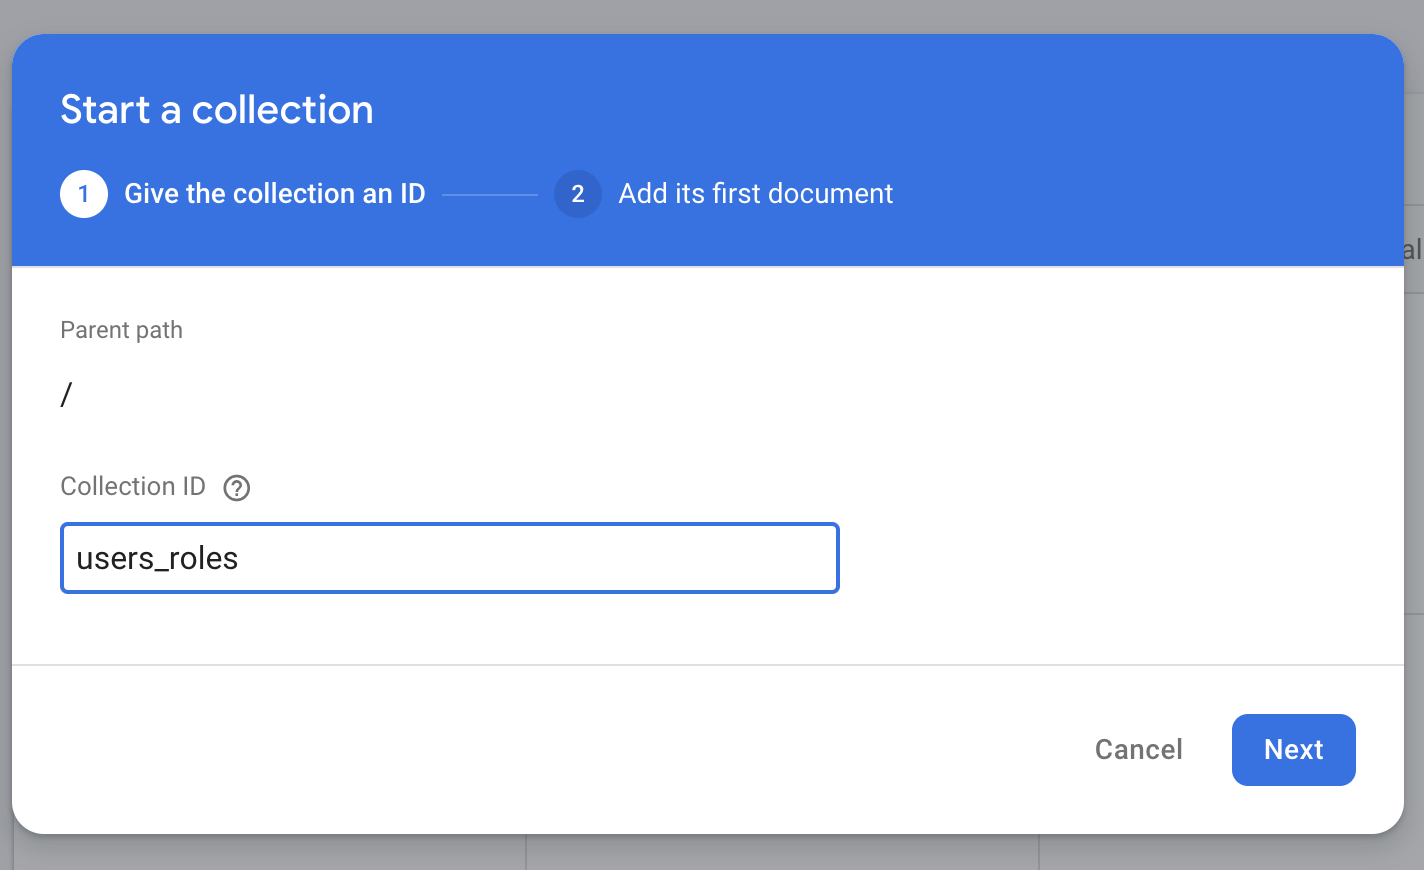
Click Start collection and name the collection users_roles.
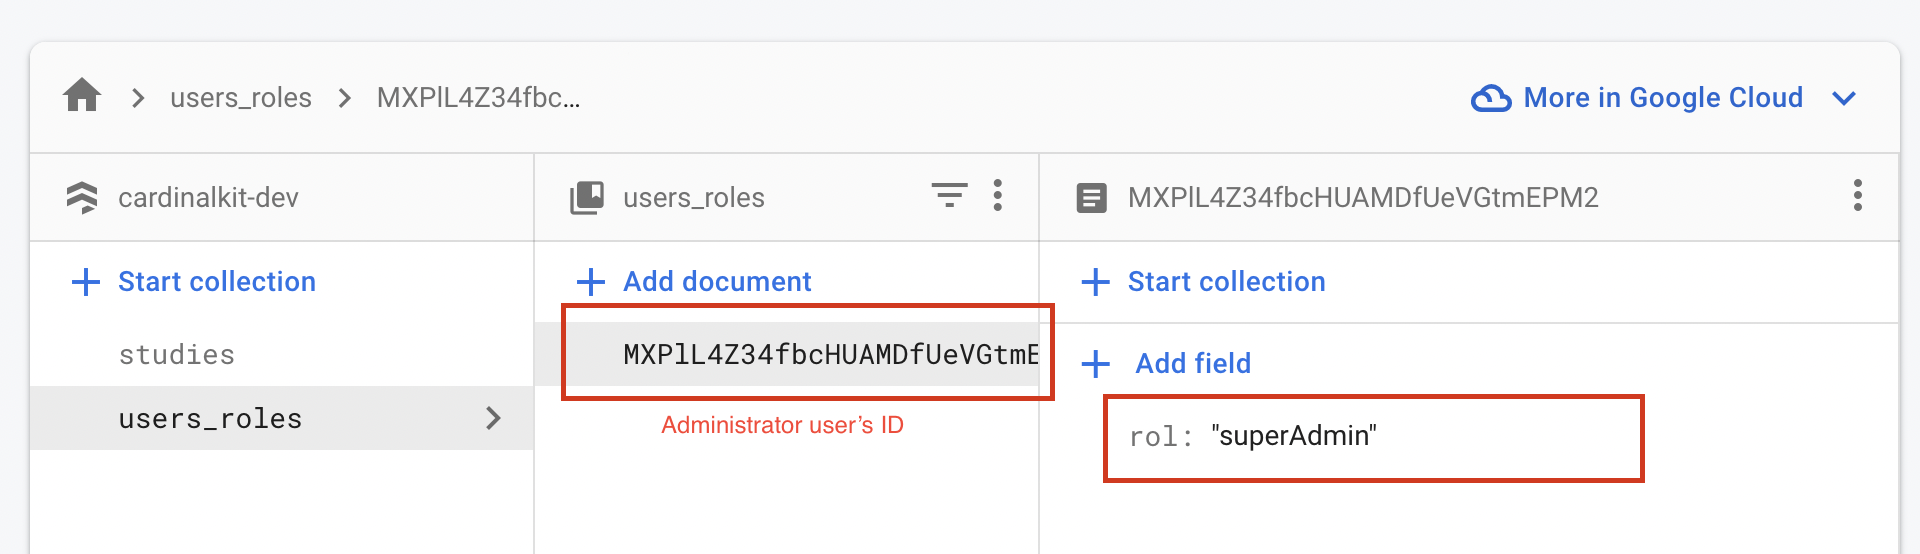
Now, within the newly created collection, click Add document and paste in the UID of the admin user as the name. Then add a field to the document called rol with value superAdmin.
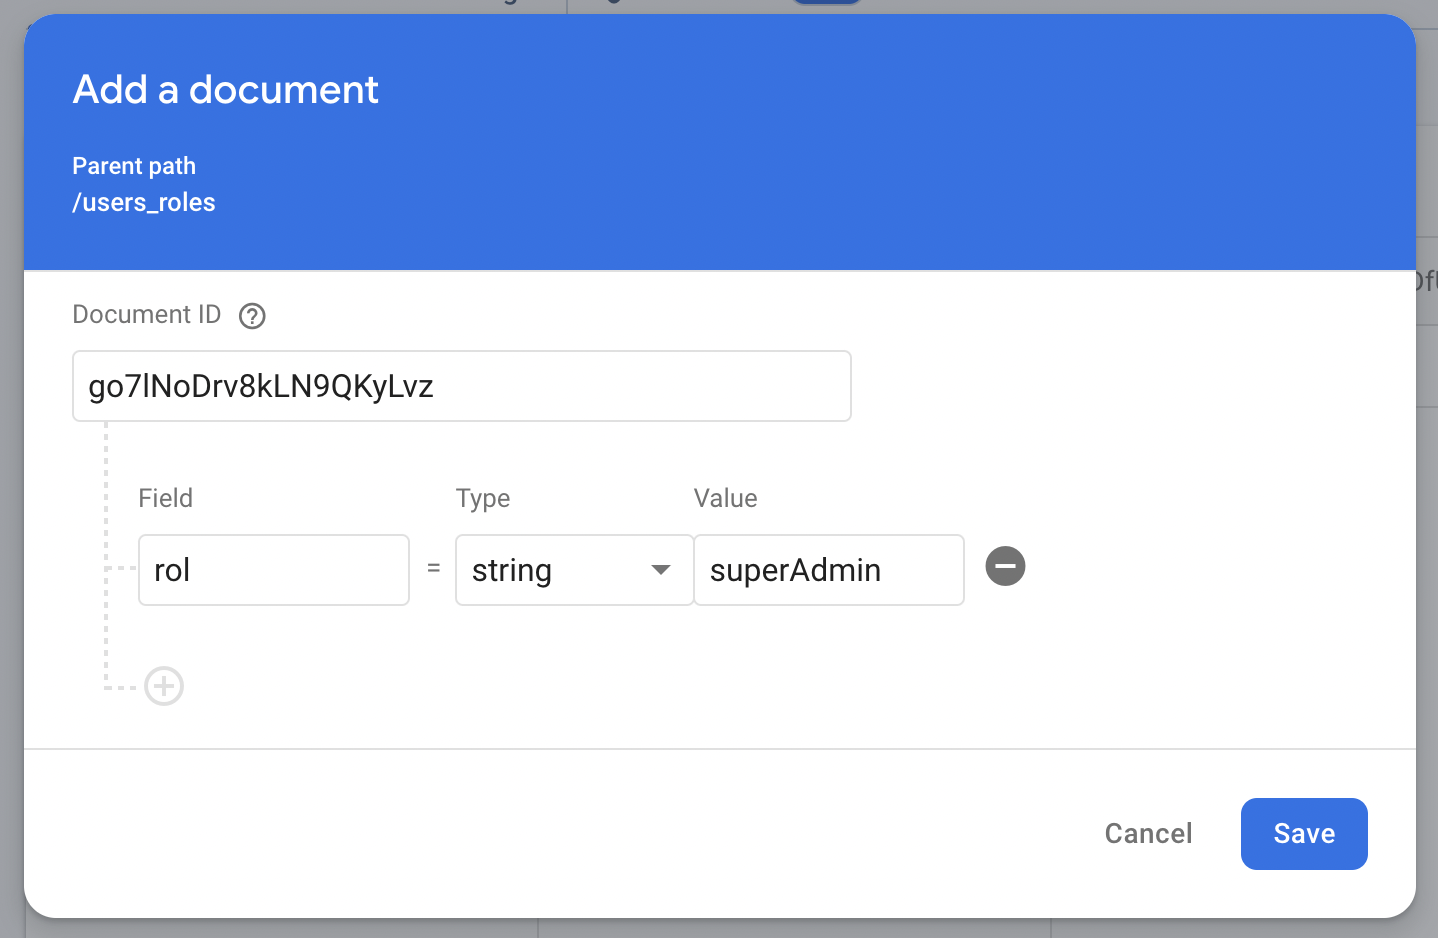
The end result should appear as follows:
3. Update Firebase Security Rules
In order for your administrator user to be able to access the dashboard, you need to update the Firebase Security Rules. This is done from the Firebase console.
Open Firestore Database in the Firebase console, and click on the Rules tab. Then replace the rules with the following:
rules_version = '2';
service cloud.firestore {
	match /databases/{database}/documents{
  	match /studies/{studyId}{
    	allow write: if request.auth!= null
        allow read: if request.auth!= null

        function accessToStudy() {
   			let data = get(/databases/$(database)/documents/users_roles/$(request.auth.uid)).data;
   			return "studies" in data && studyId in data.studies;
   		}

        match /users/{userId}/{path_=**}{
        	allow write: if request.auth!= null && request.auth.uid == userId

            function accessToUser(){
                let data = get(/databases/$(database)/documents/users_roles/$(request.auth.uid)).data;
                return "users_access" in data && userId in data.users_access
        	}

          allow read: if request.auth!= null &&
          (
            request.auth.uid == userId ||
            (
              exists(/databases/$(database)/documents/users_roles/$(request.auth.uid)) &&
              (
                get(/databases/$(database)/documents/users_roles/$(request.auth.uid)).data.rol == "superAdmin" ||
                (
                  get(/databases/$(database)/documents/users_roles/$(request.auth.uid)).data.rol == "doctor" &&
                  (
                    accessToStudy() ||
                    accessToUser()
                  )
                )
              )
            )
          )
        }
        match /surveys/{surveyId}/{path_=**}{
        	allow write: if request.auth.uid != null
        	allow read: if request.auth.uid != null
        }

      }
      match /users_roles/{user}/{path_=**}{
      	allow write: if request.auth.uid != null &&
        	(request.auth.uid == user ||
          	exists(/databases/$(database)/documents/users_roles/$(request.auth.uid)) &&
          	get(/databases/$(database)/documents/users_roles/$(request.auth.uid)).data.rol == "superAdmin")
        allow read: if request.auth.uid != null
      }
	}
}
Click Publish to save your new rules.
4. Create Indexes
Cloud Firestore requires indexes to be created for each query. In this section, we will create custom indexes that our dashboard will use.
Navigate to Firestore Database, then click the Indexes tab. Make sure Composite is selected.

Please add the six indexes that are shown in the image above by clicking Add Index. It may take a couple of minutes for the indexes to finish building.
5. Test the Dashboard Locally
Now you can test the dashboard locally.
cd cardinal-kit-web
Once in the folder, the first thing is to install all the dependencies that the Vue project needs. For this we will use npm:
npm install
After having everything installed and configured, we can run the project.
npm run serve
6. Deploy the Dashboard to Firebase Hosting
Once we confirm that our dashboard is working properly locally, we can deploy it to Firebase Hosting.
First, make sure you are in the cardinal-kit-web/src directory in your terminal.
cd cardinal-kit-web/src
Then, we need to install dependencies.
npm install
Now, run the build script to create a production build of your dashboard.
npm run build
Then, login to firebase from the command line.
firebase login
Now, connect the directory to your Firebase project.
firebase init
Firebase will go through a series of questions:
- Which Firebase CLI features do you want to set up for this folder? → hosting: Configure and deploy Firebase Hosting sites
- Please select an option: Use an existing project
- What do you want to use as your public directory? → dist
- Configure as a single page app? Y
- File dist/index.html already exists. Overwrite? N
Now, deploy your dashboard to Firebase:
firebase deploy
You will now be given a URL where you can see the dashboard live! Now that your environment is set up, the next time you can just run firebase deploy to deploy your updates.