Create a New CardinalKit iOS App

1. Install Xcode and Cocoapods
iOS apps are natively built in Xcode, an app available on the Apple Mac App Store. Download the most recent version of Xcode available, if you have not already. We recommend having at least Xcode v13.
TIP
To find your Xcode version, you can type system_profiler SPDeveloperToolsDataType in the terminal.
You will also need to install Cocoapods, a package manager for iOS apps, by running the following command in your terminal (if you don't already have it).
sudo gem install cocoapods
If you have homebrew installed on your Mac, alternative you can also run:
brew install cocoapods
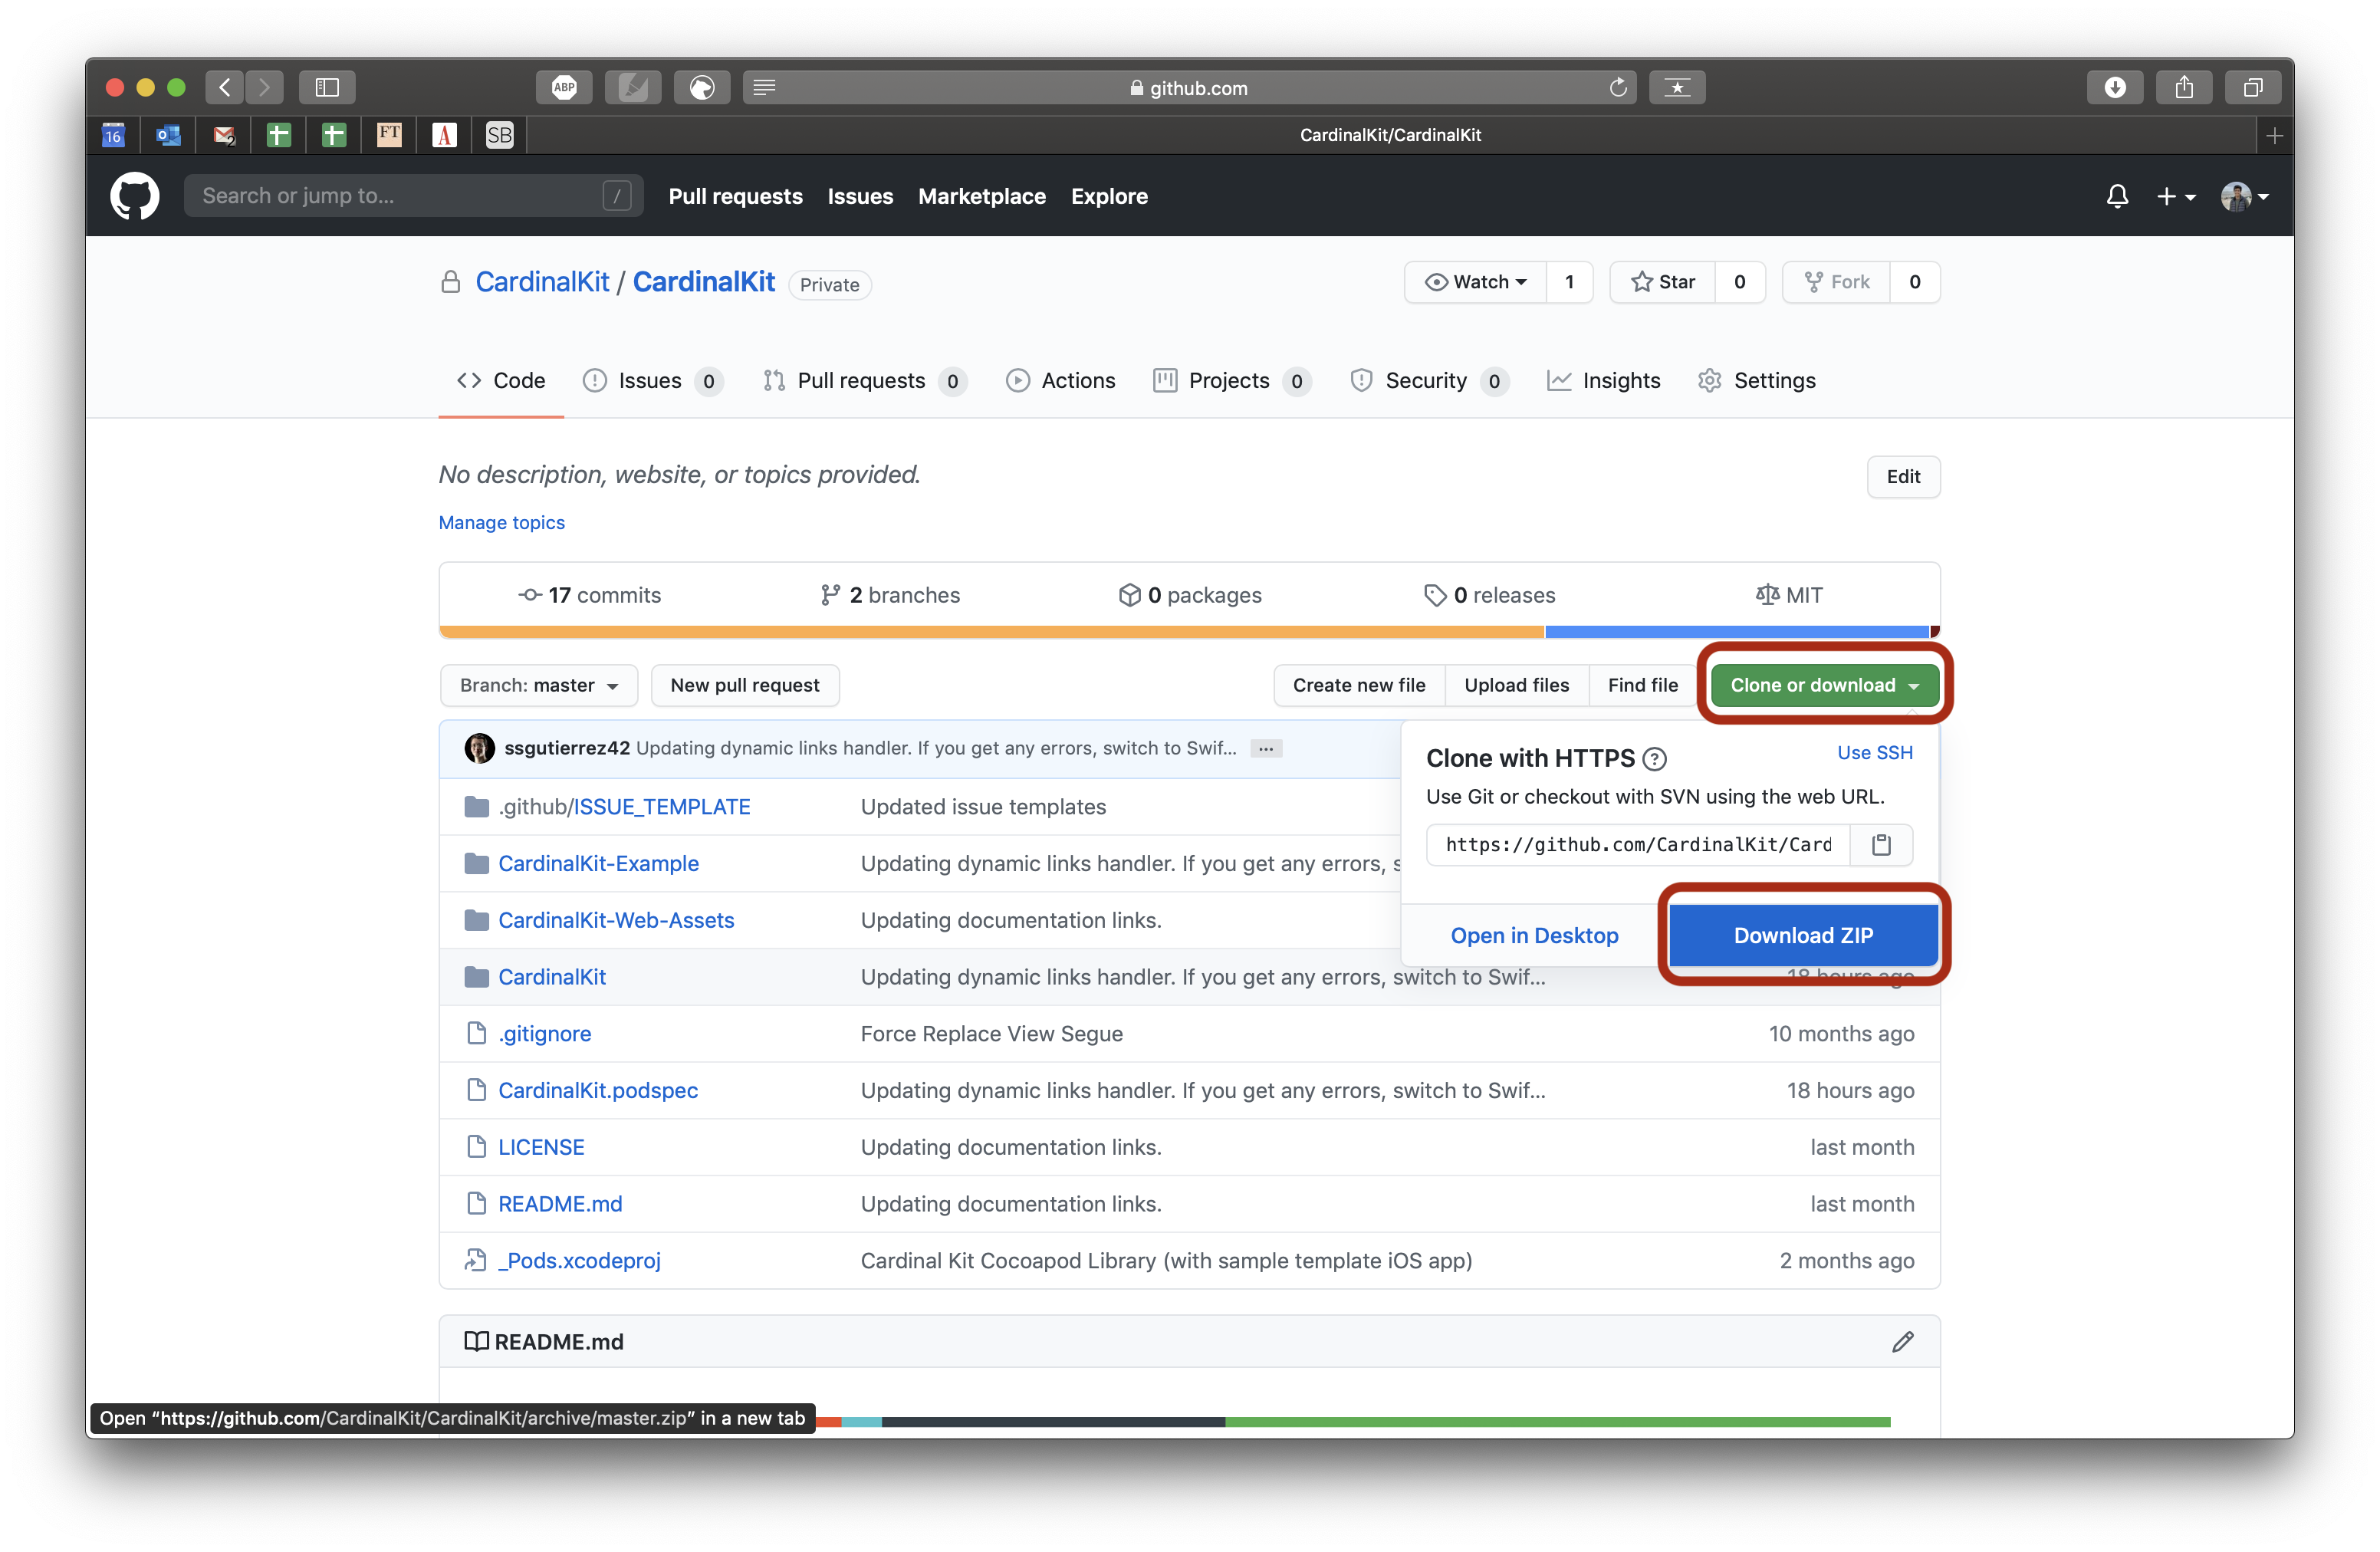
2. Download the Template Project
Our open-source project is available on our Github. If you are familiar with Git, you can clone the project to your Mac in your terminal as follows:
git clone https://github.com/CardinalKit/CardinalKit.git
Alternatively, you can also download the project as a zip file by clicking "Code" > "Download Zip". If that doesn't work, click here. to download the file directly.
3. Install Dependencies
In your terminal, navigate to the folder where your template project files were downloaded. Change to the 'CardinalKit-Example' subfolder, where the template app is located and run 'pod install' to install dependencies via CocoaPods. This process may take a few minutes.
cd CardinalKit-Example
pod install
4. Open the Project in Xcode
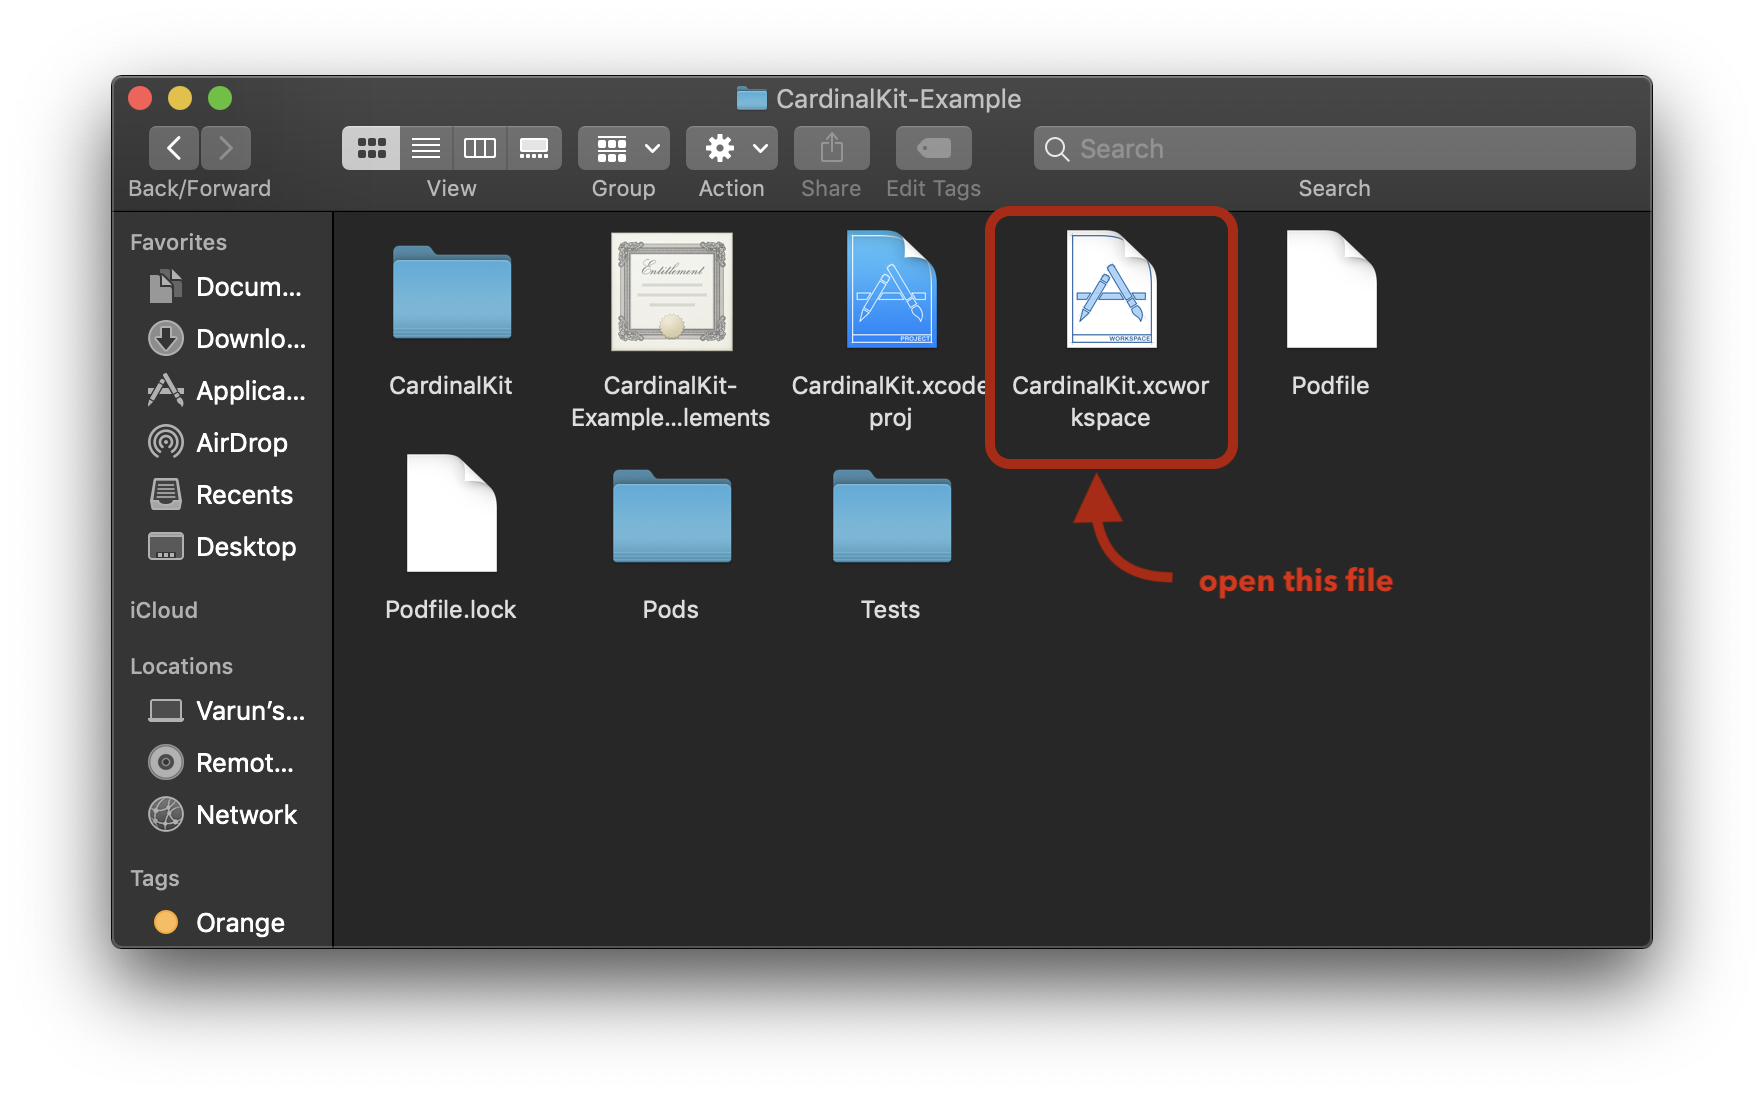
Now open the CardinalKit project folder in Finder.
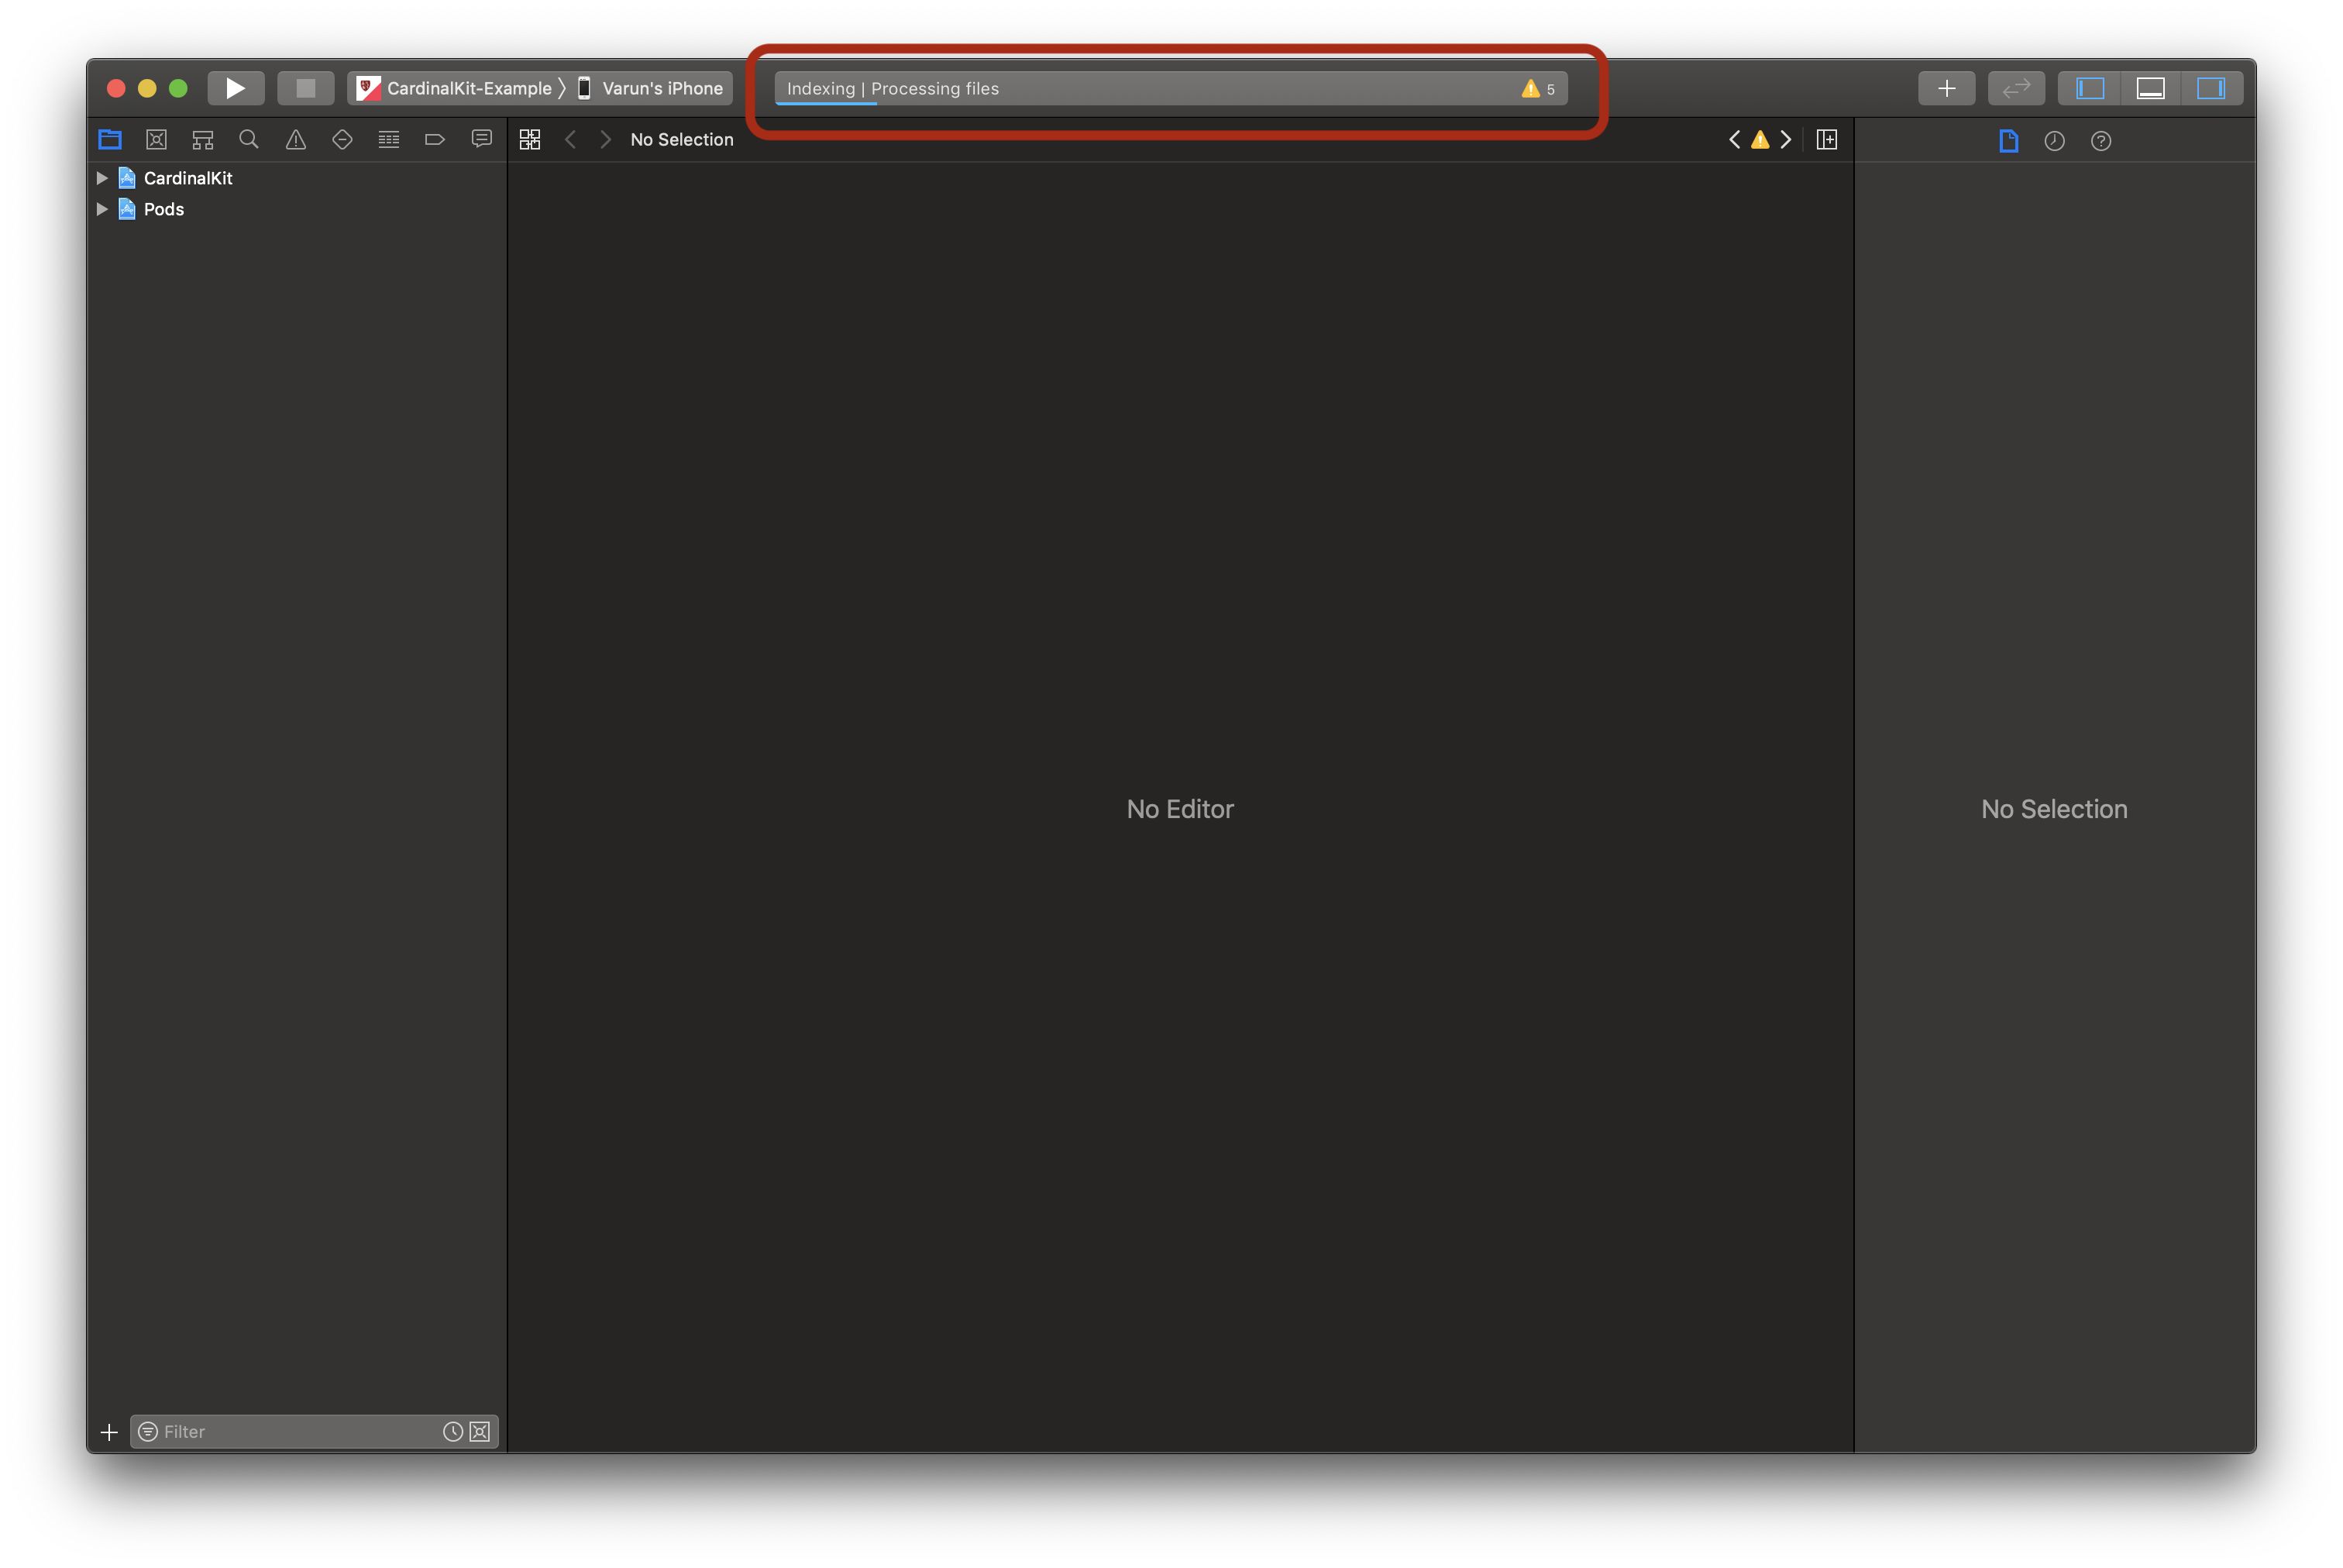
Navigate to the "CardinalKit.xcworkspace" file located in the "CardinalKit-Example" folder. You should see something like this. Open the "CardinalKit.xcworkspace" file. Xcode should automatically launch with the project open. This is a sample app that you will customize to meet your needs. Xcode will start indexing your project and will display Indexing | Processing Files for a few minutes in the top bar. You don't need to wait for this process to complete in order to continue with this guide.
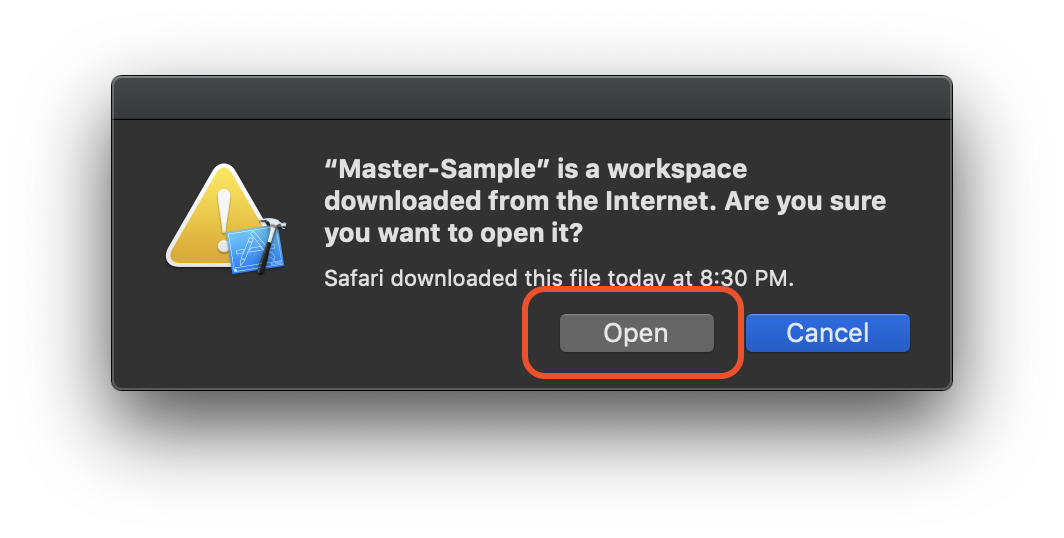
If a pop-up indicating that you opened a file downloaded from online appears, select "Open".
TIP
At some point during this process, the project may ask to request a part of your keychain with a chain of intrusive popups. In this case, type in your password and click "Always Allow". Xcode and this project is entirely local so this is safe.
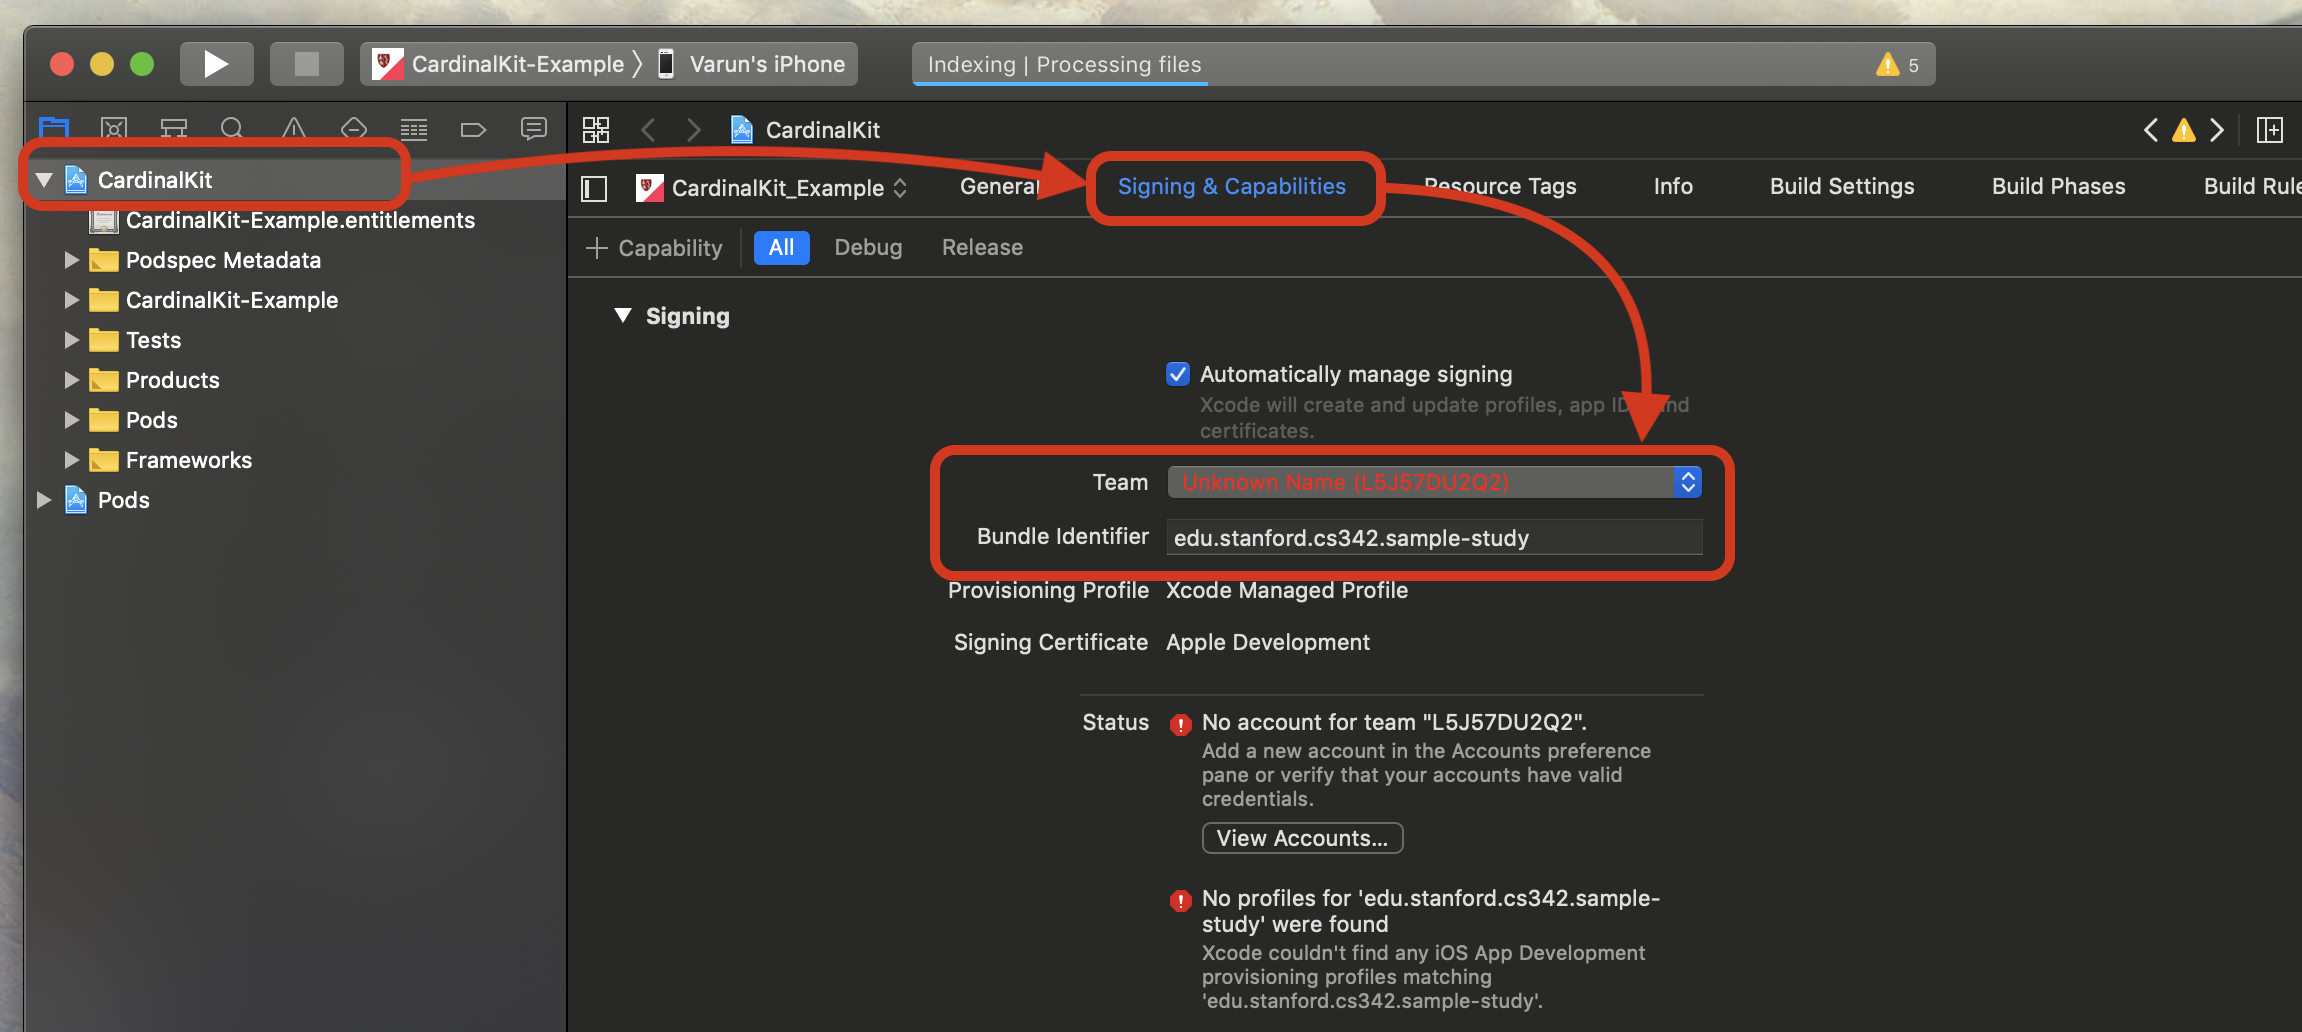
5. Configure the Project
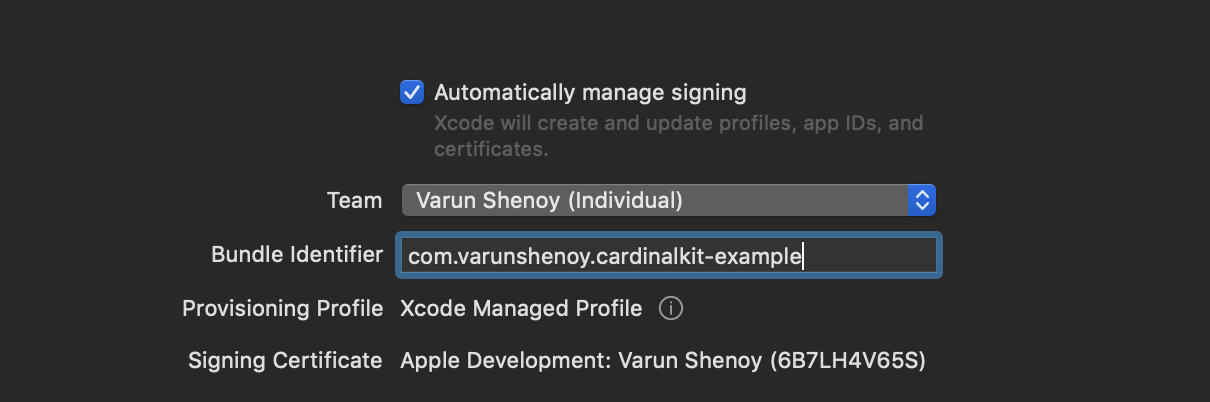
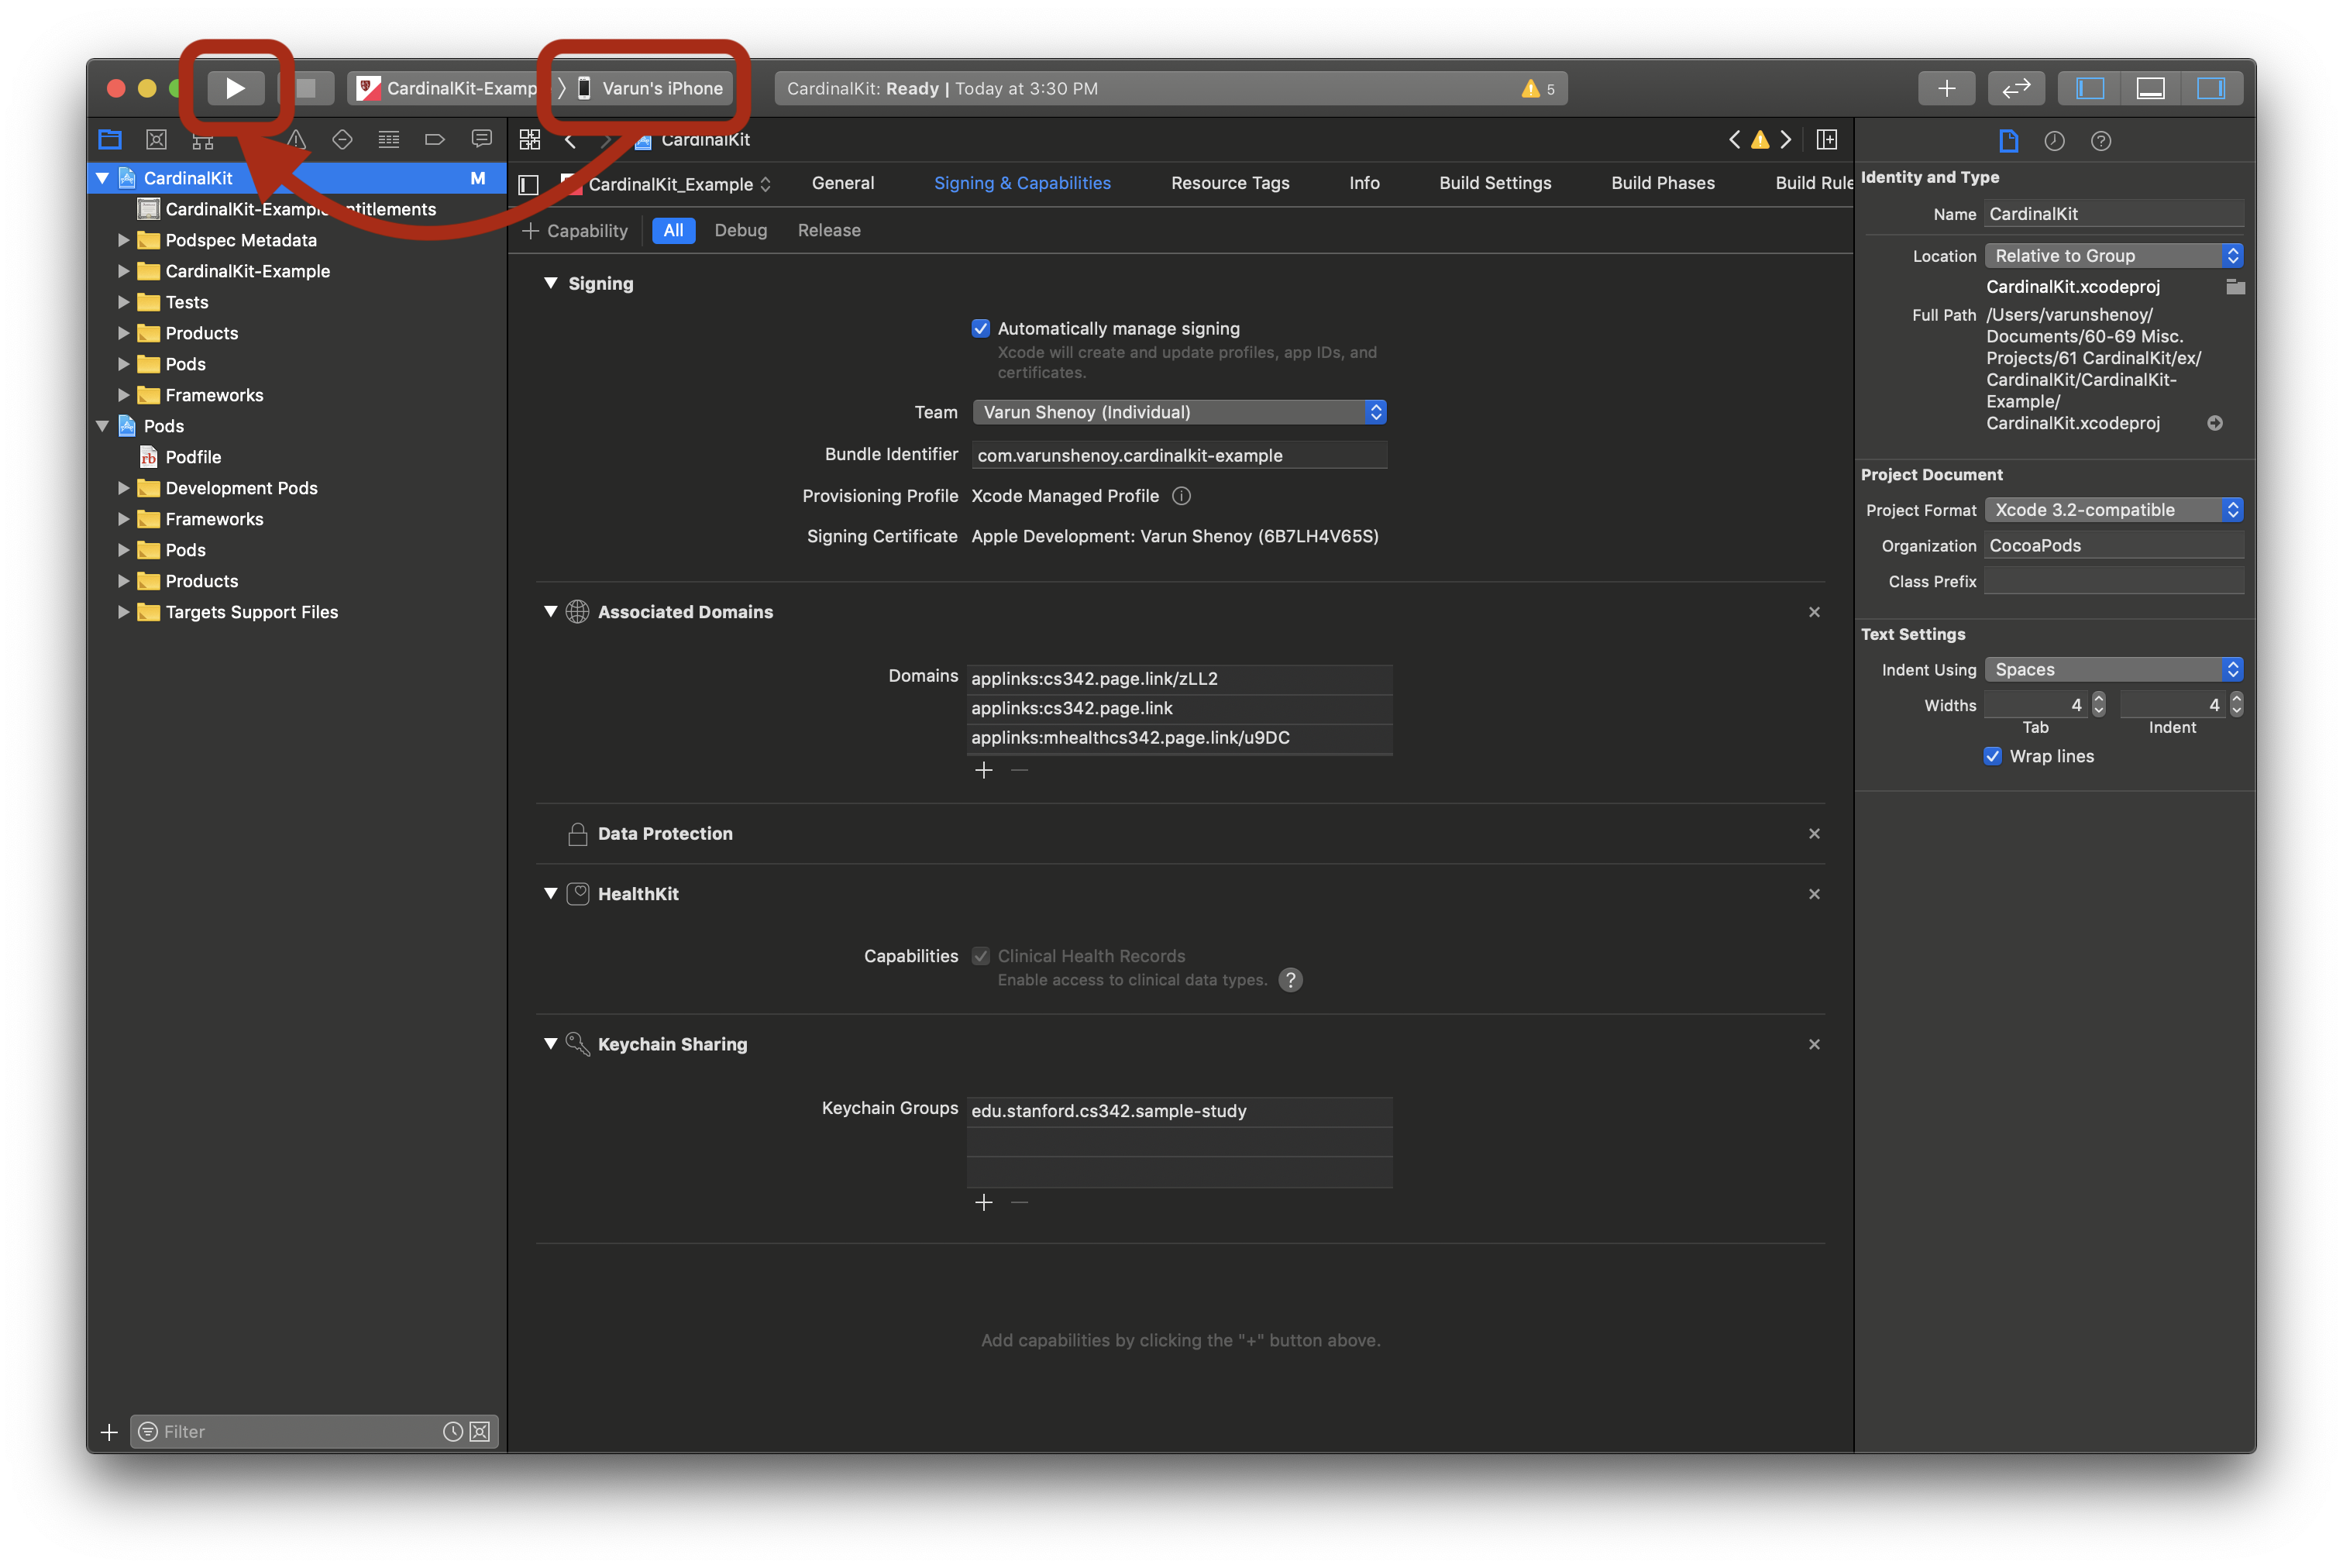
Click on the main root project in the sidebar and change the iOS bundle ID and team to match your project.
Remember the bundle ID for later since it will be needed to connect your database to the app. It should be of the format "com.[TEAM-NAME].[PROJECT-NAME]". Write down this bundle ID for later as it will be crucial in setting up the database component of the app.
TIP
If you get a status message that states "Unable to log in with account '[YOUR EMAIL]'" or "No profiles for '[YOUR BUNDLE ID]' were found", don't worry as your app should still compile and you should continue with this guide.
Once that is complete, your "Signing and Capabilities" page should look like this (with your team and project names):
6. Wait for Reindexing to Complete
Xcode takes a while to open a project. Wait until Xcode is finished indexing the project. At the top of Xcode, there will be light blue progress bar showing this. Once it is complete, and no red errors pop up, we can run the project. This can take anywhere from 5 to 10 minutes.
7. Test Your App
Specify the target for deployment. Select either your phone (if it is plugged in) or pick a device to simulate (we recommend iPhone 11 and iOS 14 or greater). Press the "Play" button, shown below to run the app in the simulator. The first time you build the app, it will take 5 to 10 minutes due to it having to load all of the frameworks for the first time.
When the simulator boots up and opens up the app, you may be faced with a white screen for a few seconds to a minute. This is normal for the simulator on the first run of the app. Your project may show several warnings indicated by a yellow triangle "⚠️" but that is fine.
If your app is now up and running, continue onto the next section to set up the cloud infrastructure for your app.