Generate CardinalKit App

Thanks for choosing CardinalKit! CardinalKit minimizes your research costs and time required to survey individuals by providing your team with a system that automatically takes care of building an app and storing data. You don't even need to know how to code. The goal of this guide is to get your cloud-enabled research app up and running with minimal effort on your part.
Prior to creating a CardinalKit project, you will need to have access to a computer running MacOS.
Create a CardinalKit project

It's really easy to get started with CardinalKit. This guide will help you set up our example app in under 30 minutes.
1. Install Xcode and Cocoapods
iOS apps are natively built in Xcode, an app available on the Apple Mac App Store. Download the most recent version of Xcode available, if you have not already. We recommend having at least Xcode v11.2.1.
To find your Xcode version, you can type system_profiler SPDeveloperToolsDataType in the command line.
You will also need to install Cocoapods, a package manager for iOS apps. First, install Homebrew by running the following command in your terminal.
/bin/bash -c "$(curl -fsSL https://raw.githubusercontent.com/Homebrew/install/master/install.sh)"
Then, run brew install cocoapods.
You're now ready to get started with CardinalKit!
2. Download the CardinalKit Template Project
Our open-source project is available on Github. Download it by clicking "Clone or Download" > "Download Zip". You may havee to resize your browser to see the download button.
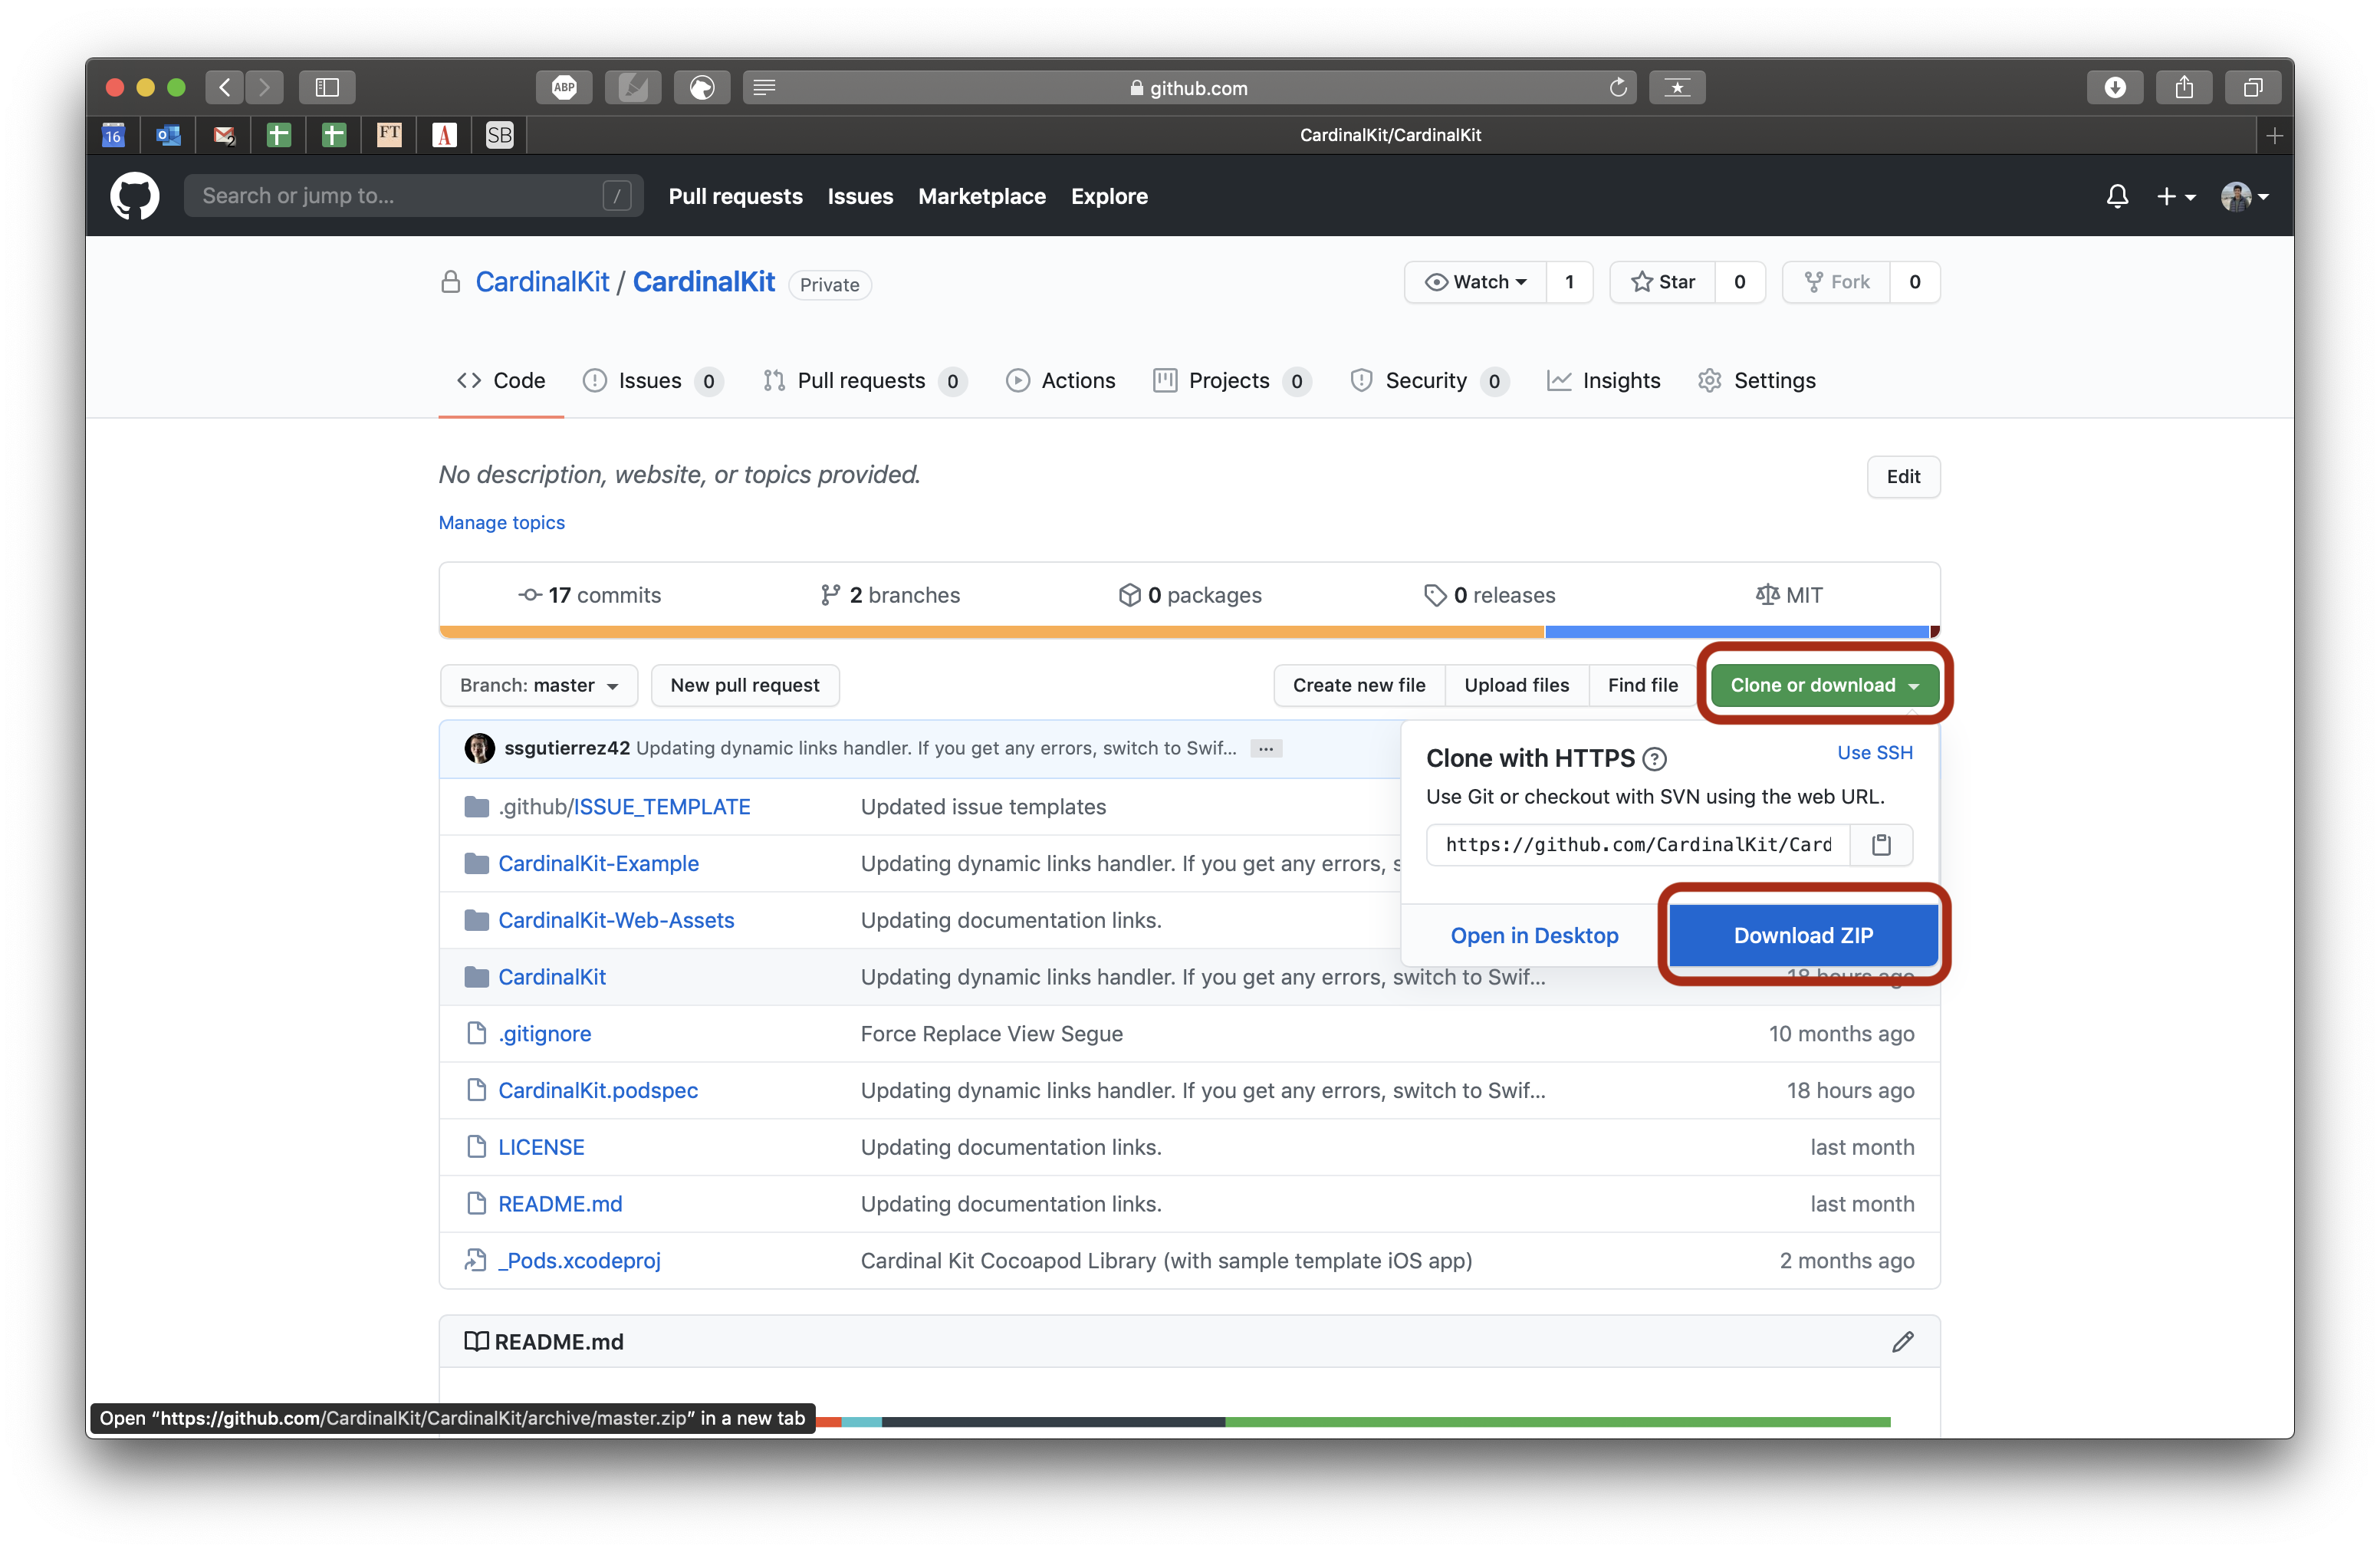
If that doesn't work, click here to download the file directly.
3. Open the Project
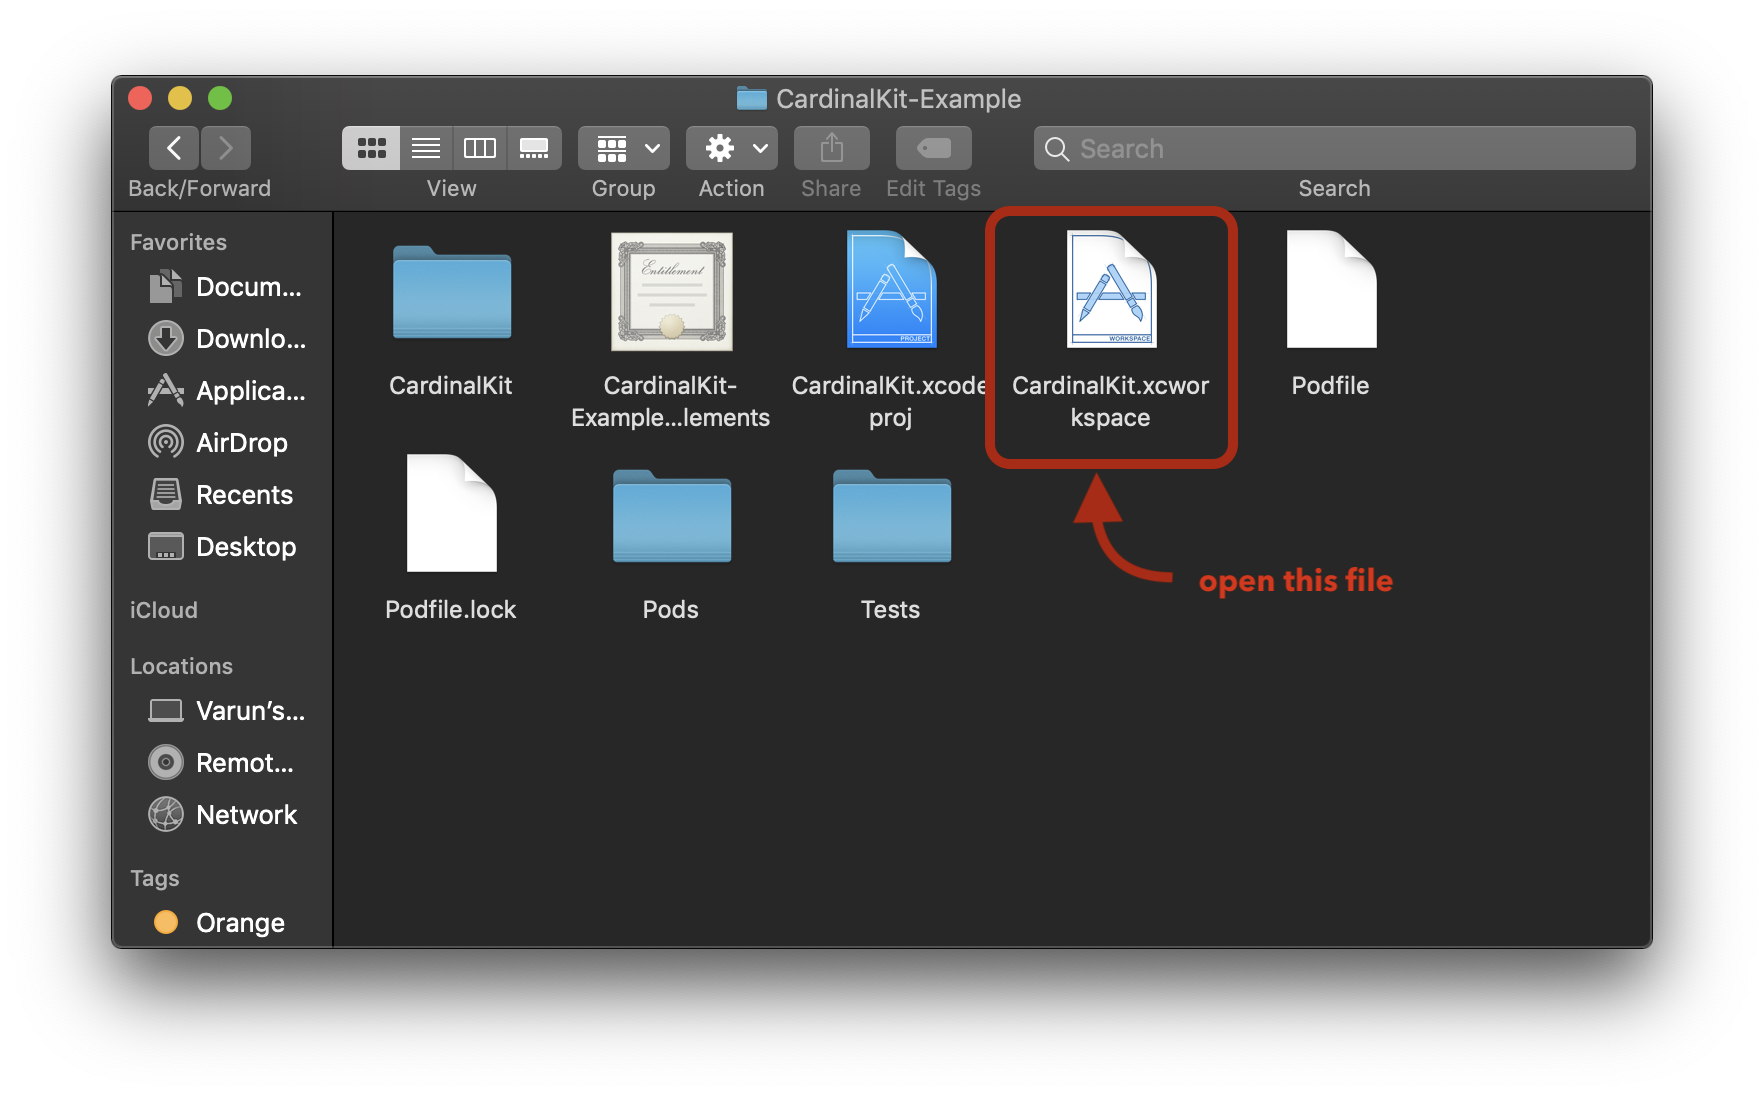
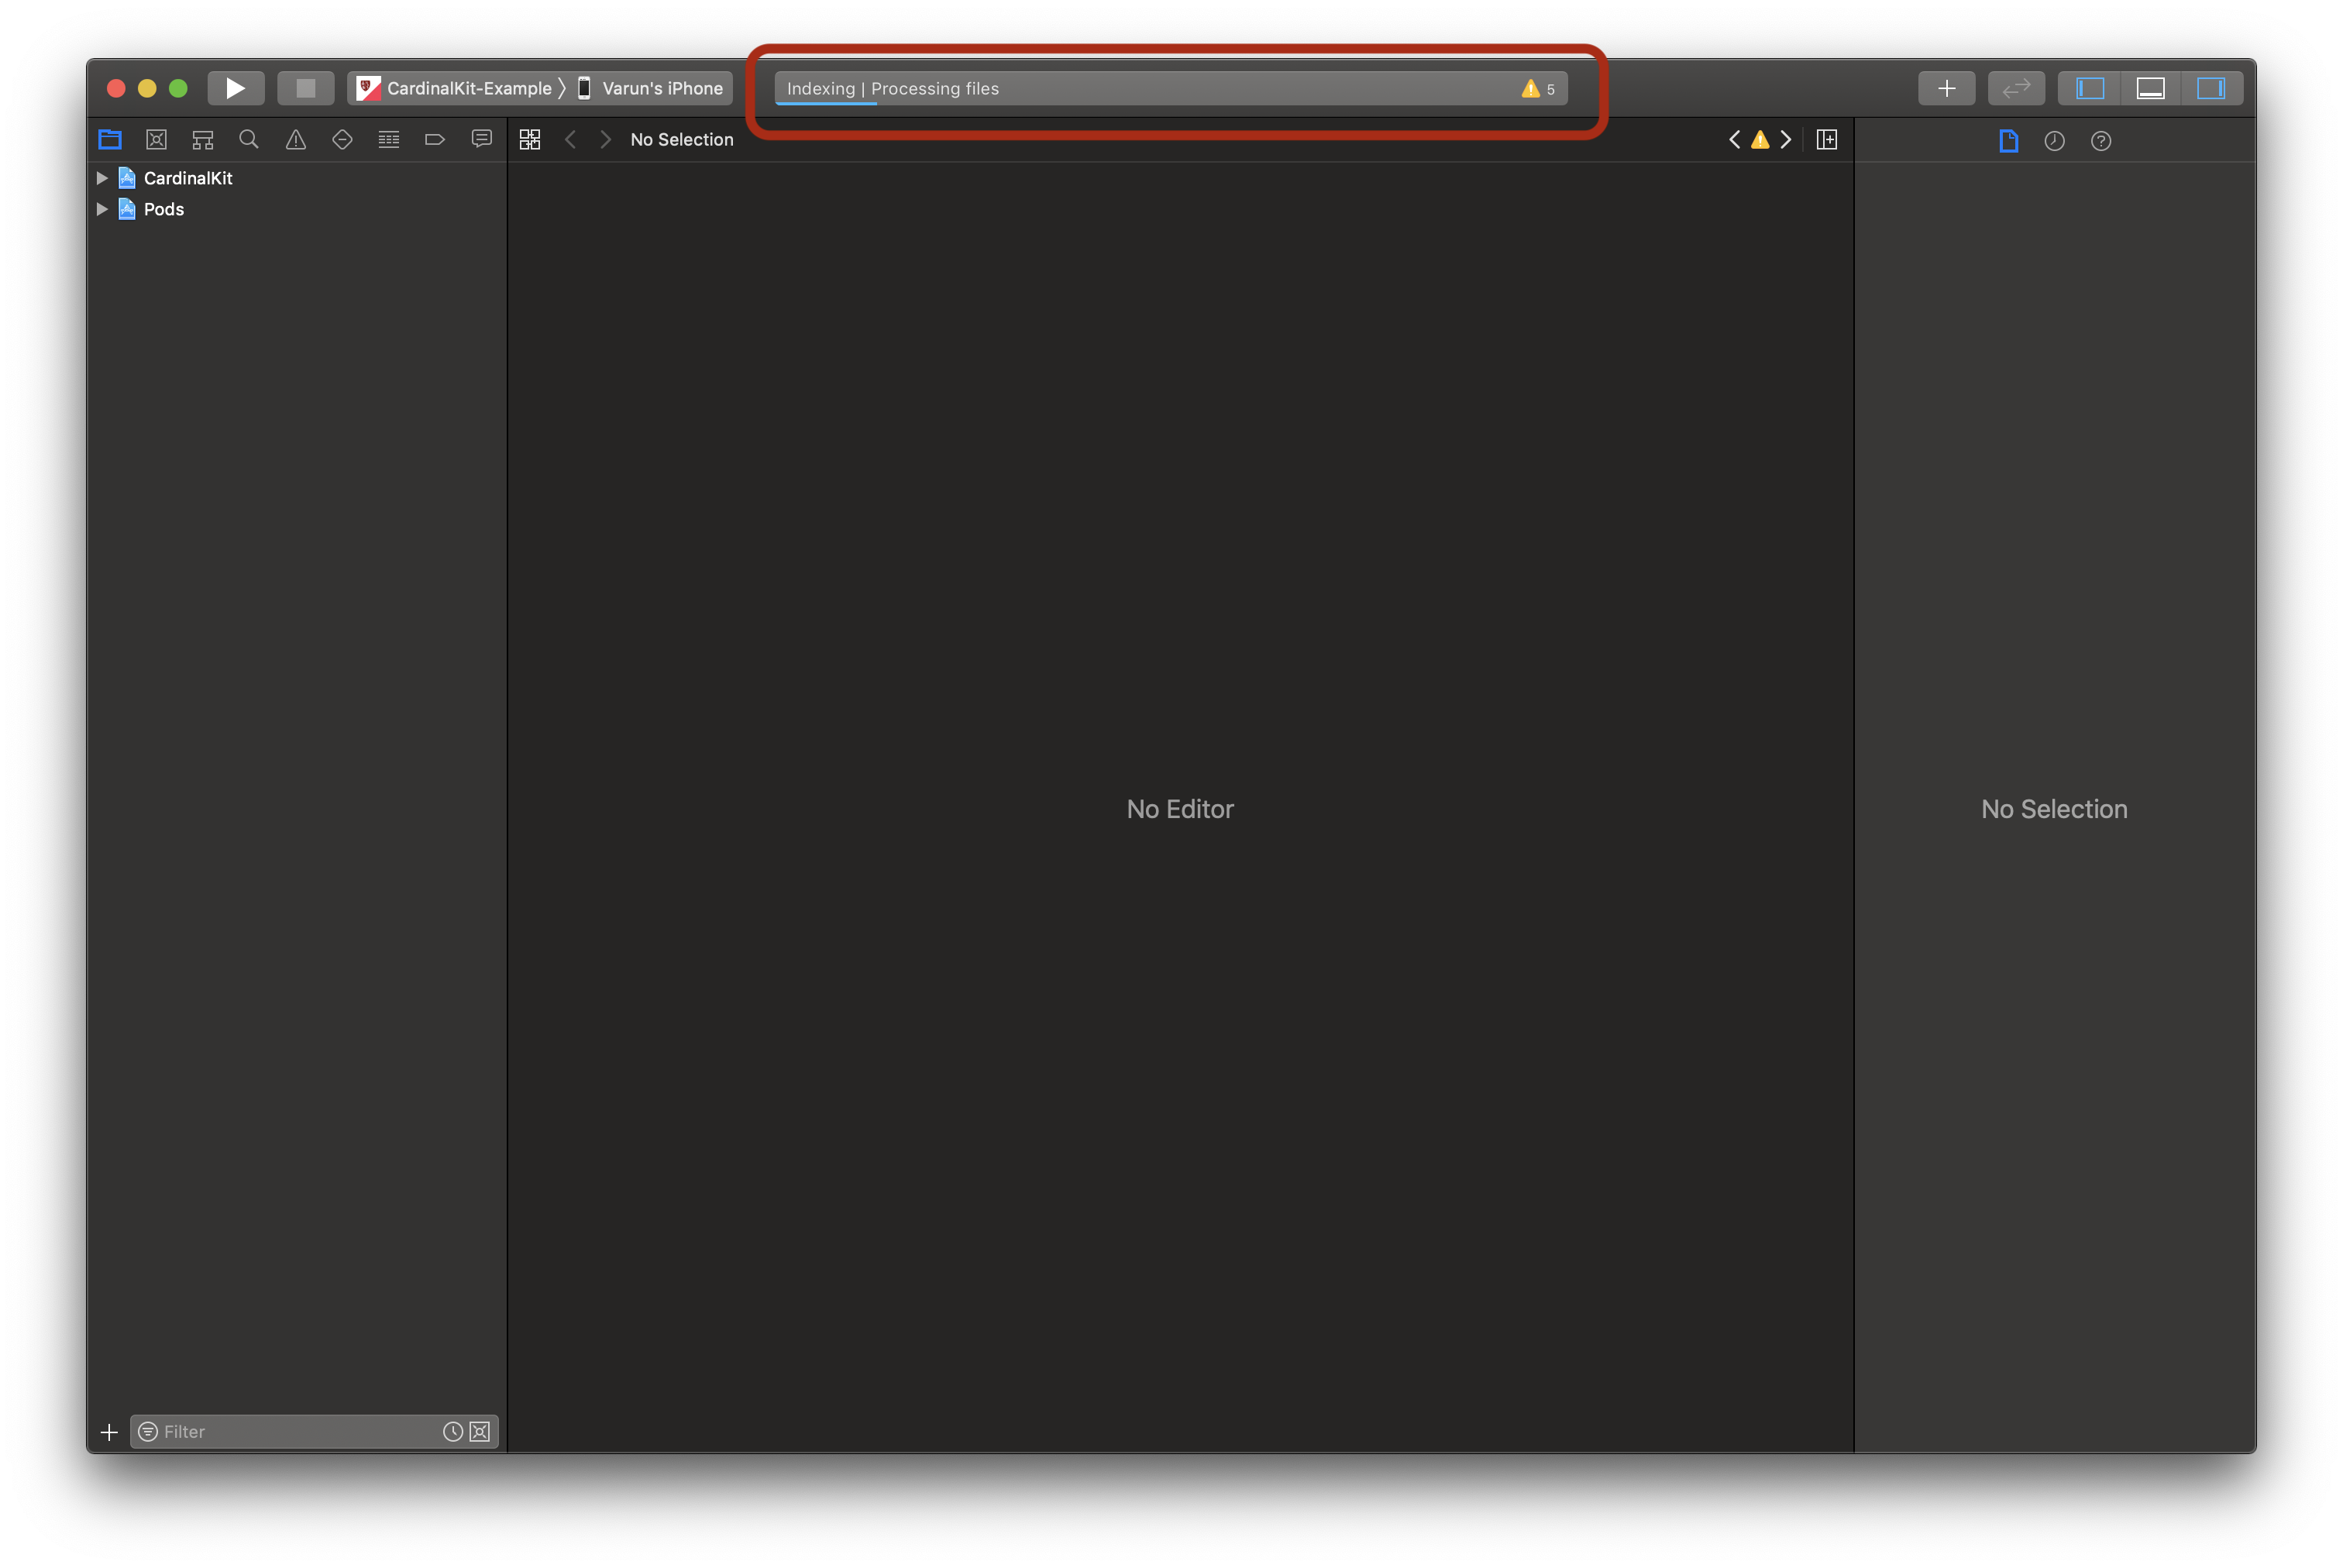
Open the folder once it is finished downloading. Navigate to the "CardinalKit.xcworkspace" file located in the "CardinalKit-Example" folder within the download. You should see something like this. Open the "CardinalKit.xcworkspace" file. Xcode should automatically launch with the project open. This is a sample app that you will customize to meet your needs. Xcode will start indexing your project and will display Indexing | Processing Files for a few minutes in the top bar. You don't need to wait for this process to complete in order to continue with this guide.
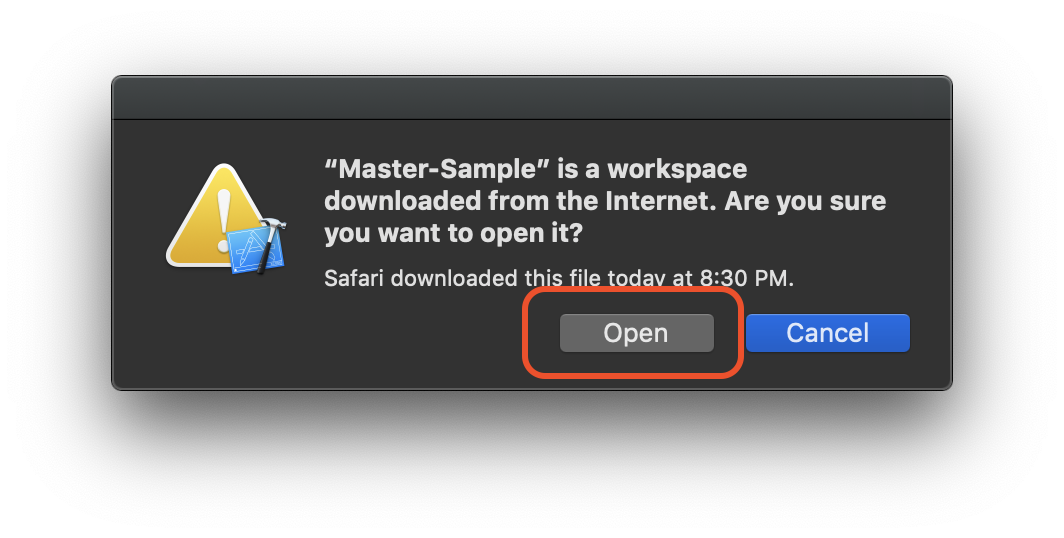
If a pop-up indicating that you opened a file downloaded from online appears, select "Open".
At some point during this process, the project may ask to request a part of your keychain with a chain of intrusive popups. In this case, type in your password and click "Always Allow". Xcode and this project is entirely local so this is safe.
4. Configure the Project
Click on the main root project in the sidebar and change the iOS bundle ID and team to match your project. Remember the bundle ID for later since it will be needed to connect your database to the app. It should be of the form "com.[TEAM-NAME].[PROJECT-NAME]". Write down this bundle ID for later as it will be crucial in setting up the database component of the app.
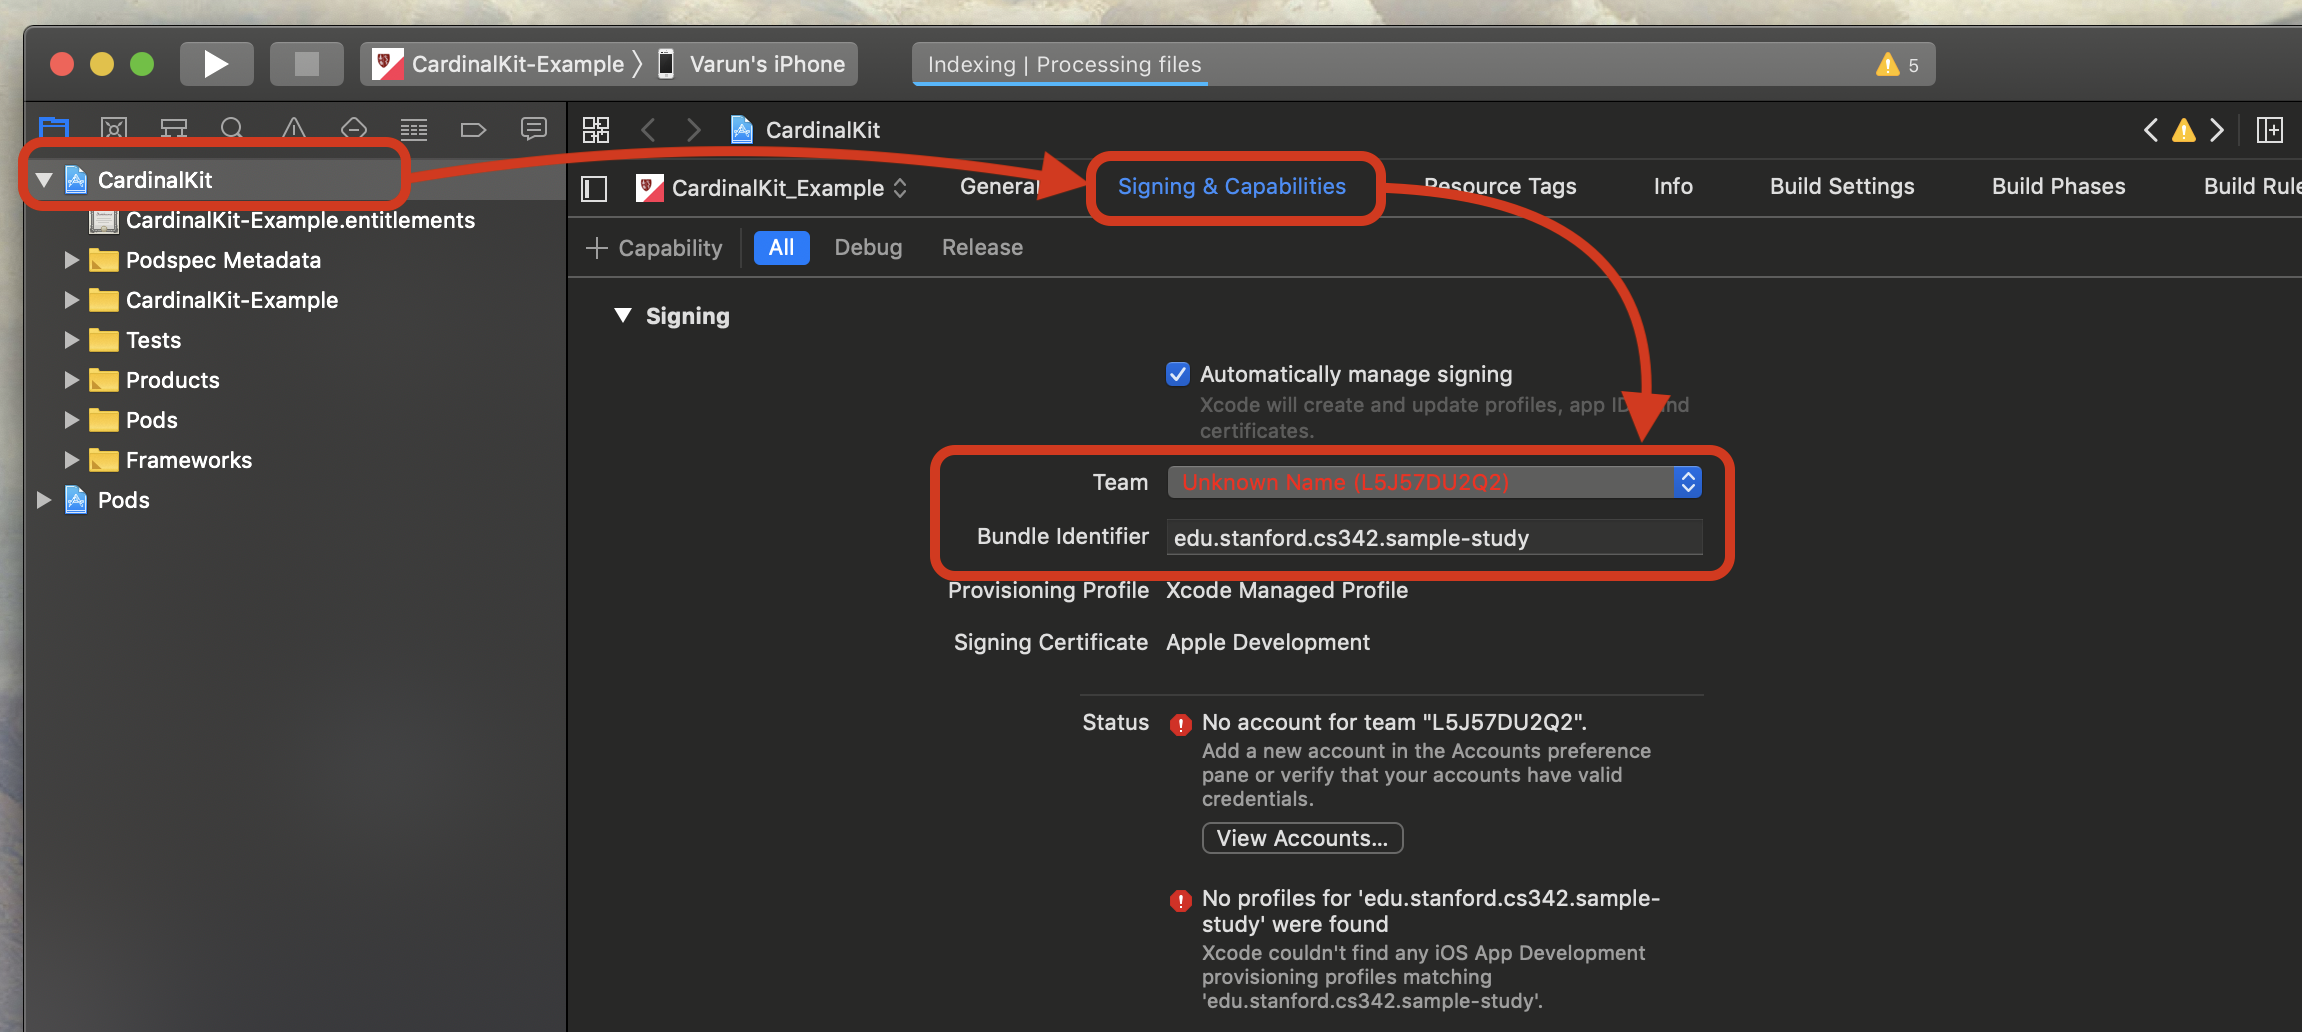
If you get a status message that states "Unable to log in with account '[YOUR EMAIL]'" or "No profiles for '[YOUR BUNDLE ID]' were found", don't worry as your app should still compile and you should continue with this guide.
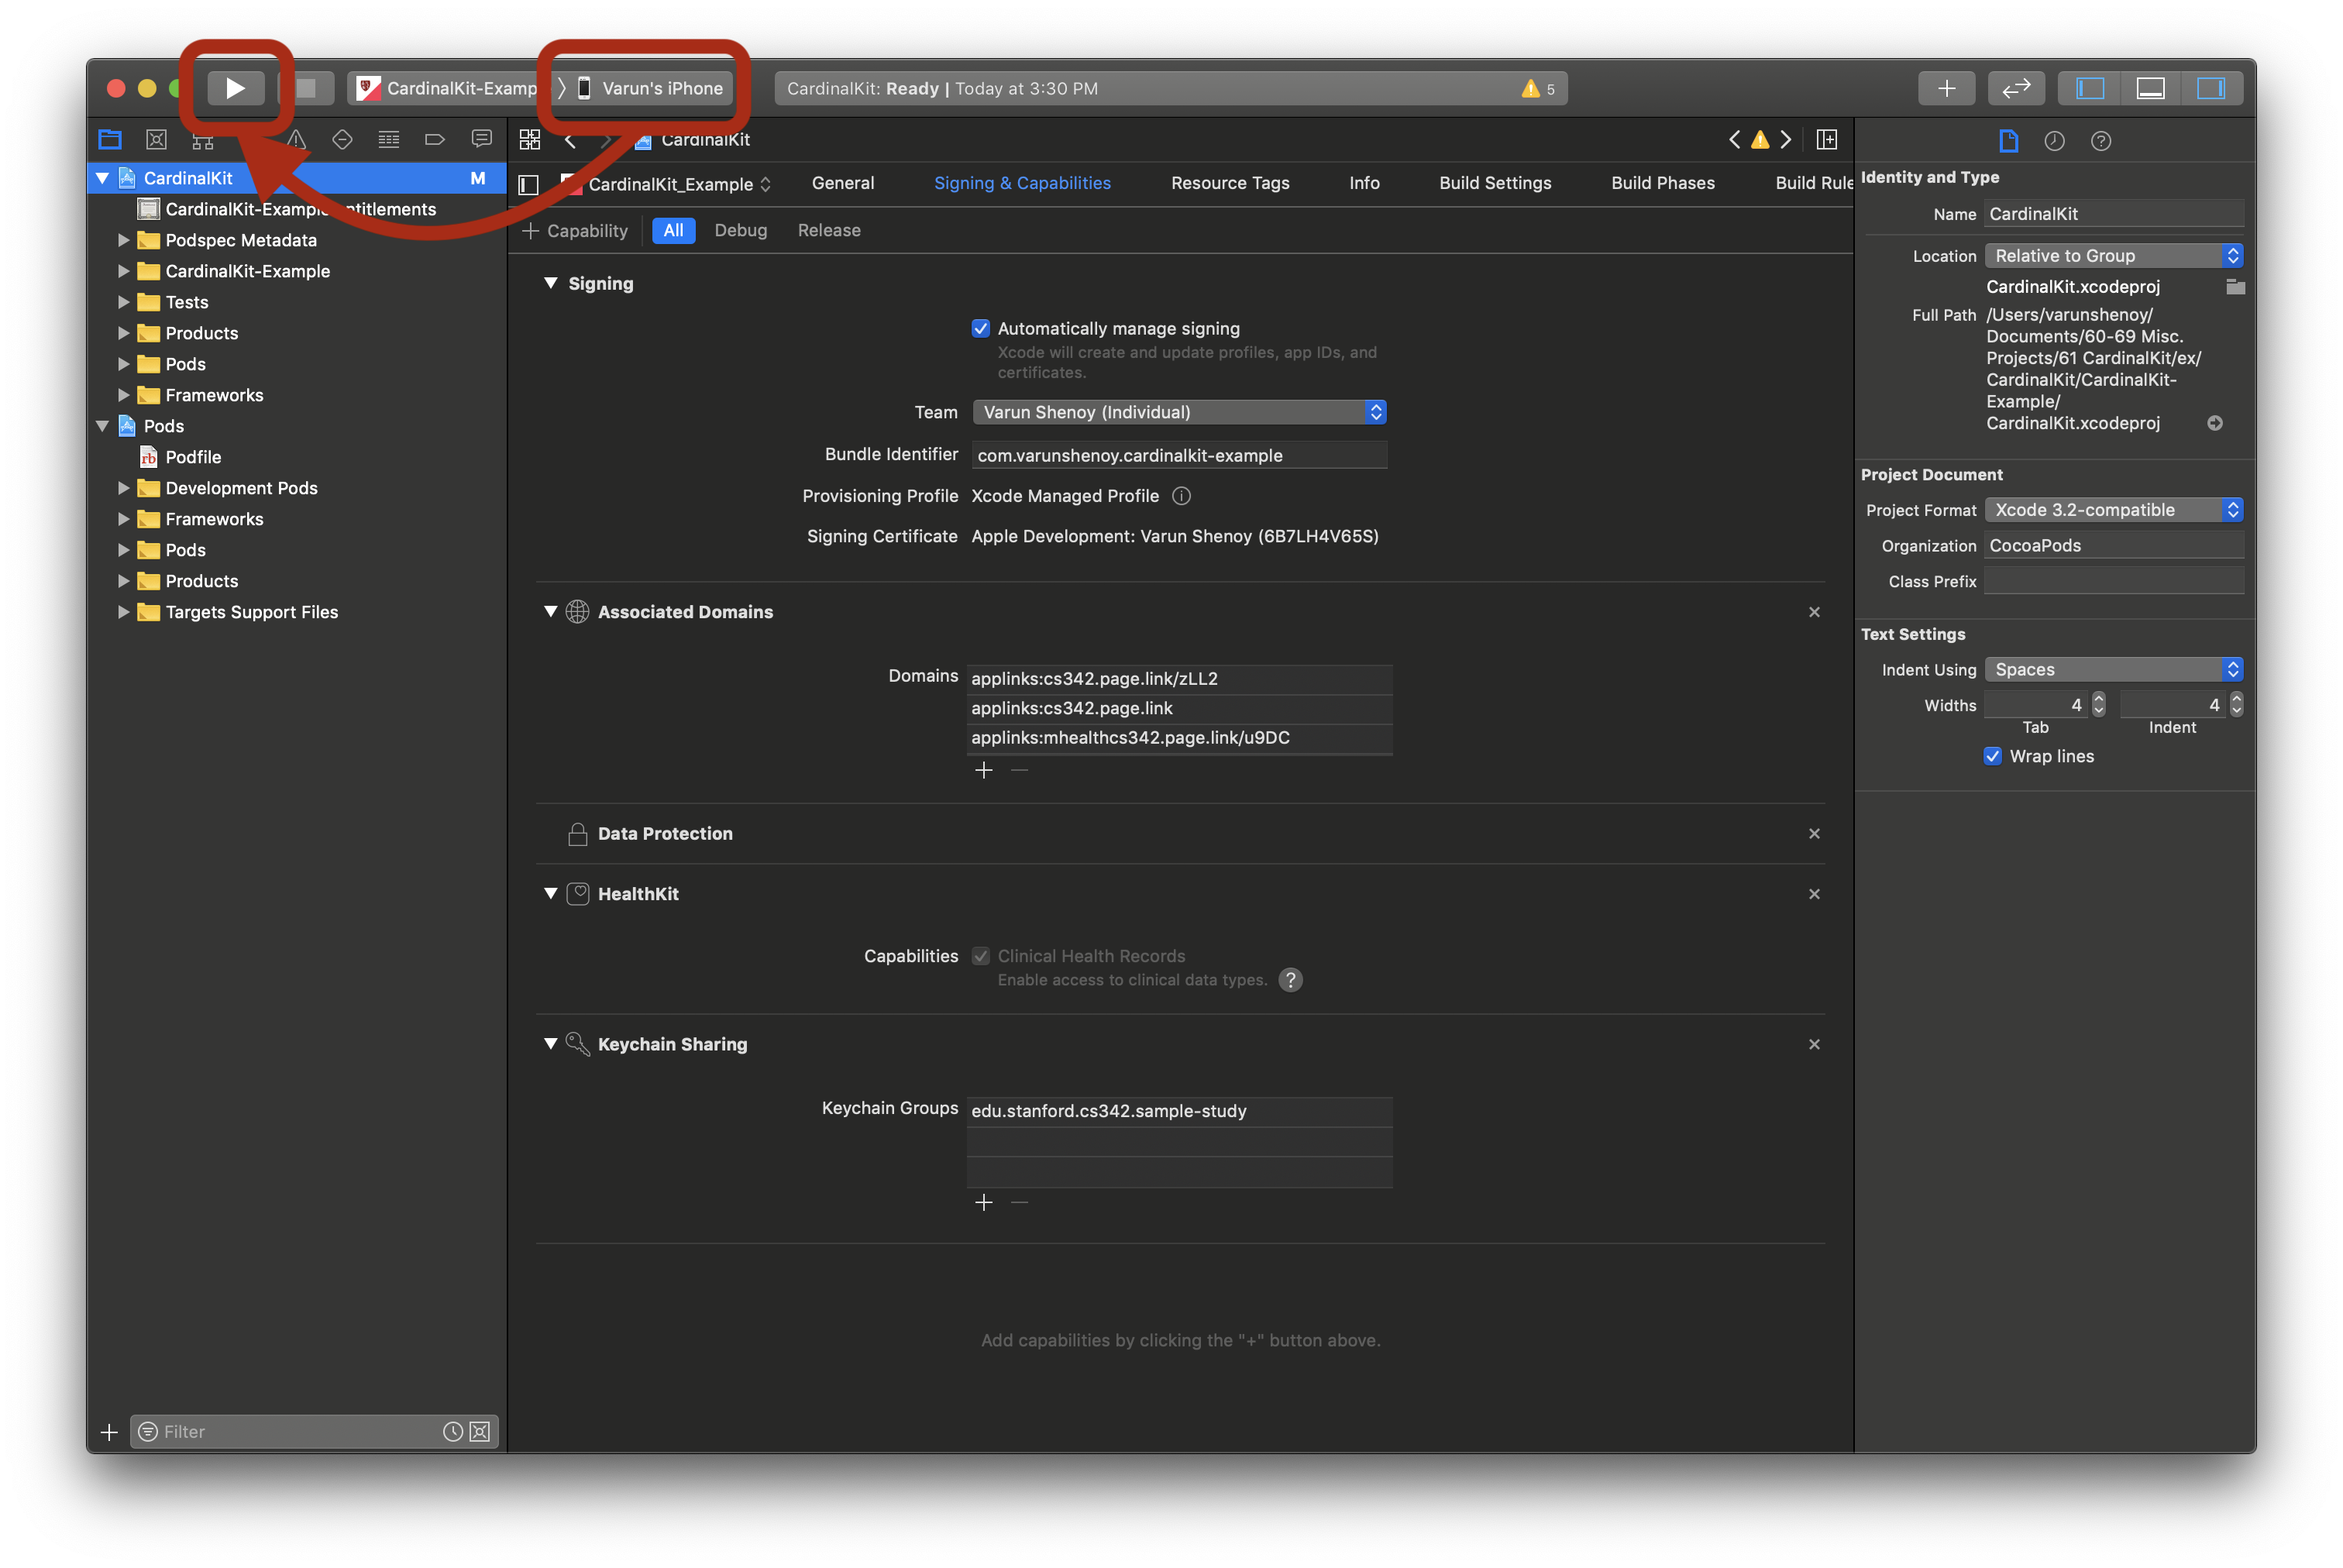
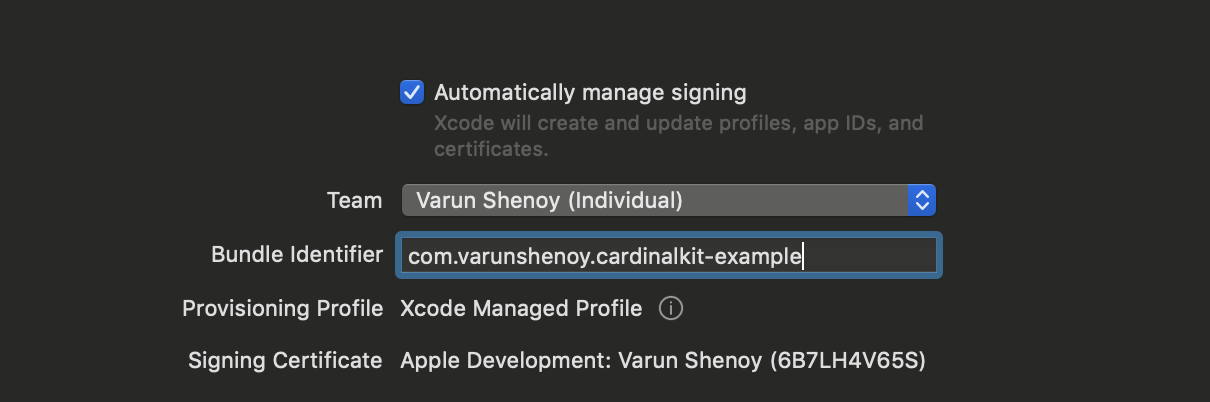
Once that is complete, your "Signing and Capabilities" page should look like this (with your team and project names):
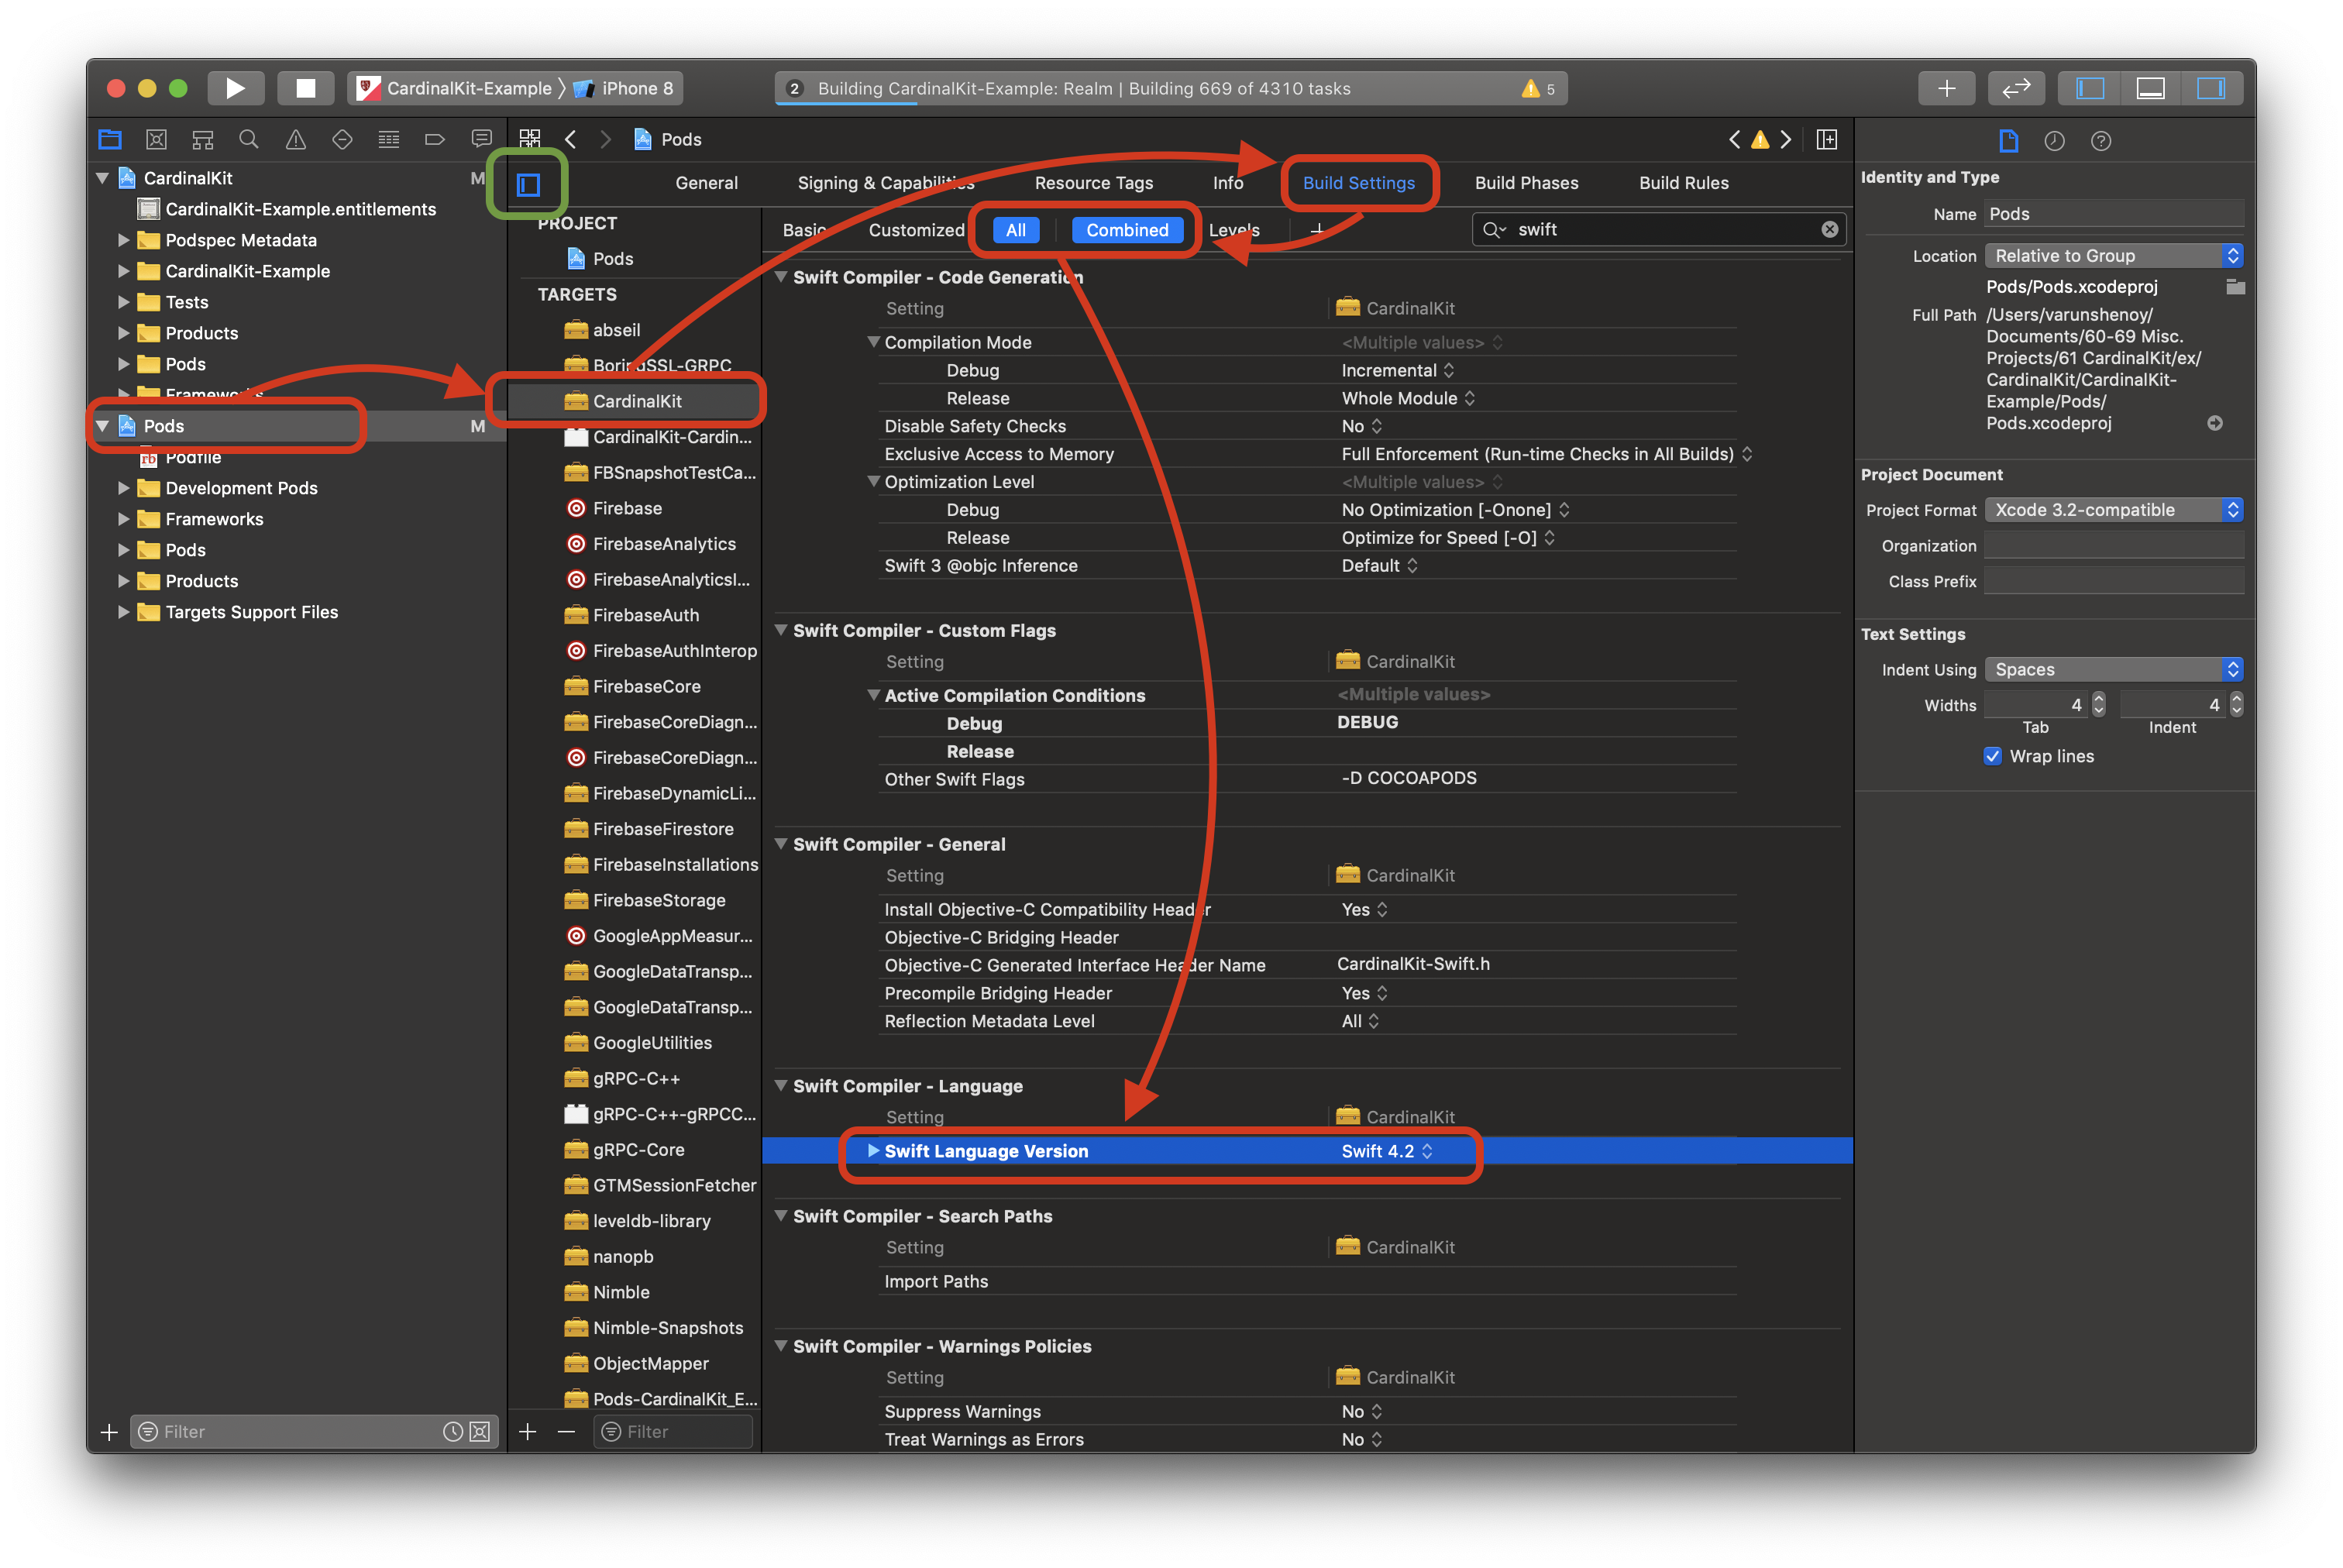
Finally, we need to set our app to use Swift 4.2. Select "Pods" (in the left hand sidebar) > "CardinalKit" (tucked away in a drawer indicated by the green box) > "Build Settings" > "Swift Compiler Language" > "Swift Language Version" > "Swift 4.2". This process is illustrated below. You will have to scroll a bit to get to this part of the file.
5. Wait for Reindexing to Complete
Xcode takes a while to open a project. Wait until Xcode is finished indexing the project. At the top of Xcode, there will be light blue progress bar showing this. Once it is complete, and no red errors pop up, we can run the project. This can take anywhere from 5 to 10 minutes.
A Quick Aside: No such module ResearchKit and Other Errors
Your project may show several warnings indicated by a yellow triangle "⚠️" but that is fine. However, a red octogon with an exclamation mark indicates an error which prevents your app from running. One common issue many CardinalKit developers hit at this stage is an error No such module ResearchKit and they can't find a way to launch the sample app.
There are two ways to get around this issue:
- Using
git clone: clone the desired branch from Github with the following syntax in your shell:git clone --recurse-submodules <the_GitHub_url>. A common issue with prepackaged modules (in our case Firebase, ResearchKit, and CardinalKit) is that a simple download may install a reference to the module rather than the module itself. - Using
pod: The fundamental issue in the app is that the modules (referenced via Cocoapods) are not actually installed. The solution is to navigate to the folder with thePodfilein the sample app using the command line (a good tutorial for those who are less familiar here). In the directory, runpod updateand then runpod install. Building ResearchKit on your own device requiresgit-lfs. The best way to install this is through Homebrew by runningbrew install git-lfs. If it is your first time building ResearchKit from source, it may take anywhere from 5-20 minutes to fully install. The modules should be fully built now. - If all else fails: a common panacea for Xcode related errors is cleaning the build folder and rerunning the application. Hit Cmd+Shift+K to clean the build folder, and try rebuilding the sample app.
6. Test app to see if it works
Specify the target for deployment. Select either your phone (if it is plugged in) or pick a device to simulate (we recommend iPhone 8). Press the "Play" button, shown in green below to run the app in the simulator. The first time you build the app, it will take 5 to 10 minutes due to it having to load all of the frameworks for the first time.
When the simulator boots up and opens up the app, you may be faced with a white screen for a few seconds to a minute. This is normal for the simulator on the first run of the app. Your project may show several warnings indicated by a yellow triangle "⚠️" but that is fine.